
Mit den App-Serverprotokollen Firebase Admin SDK oder FCM können Sie Nachrichtenanfragen erstellen und an die folgenden Arten von Zielen senden:
- Name des Themas
- Bedingung
- Geräteregistrierungstoken
- Name der Gerätegruppe (nur Protokoll)
Sie können Nachrichten mit einer Benachrichtigungsnutzlast aus vordefinierten Feldern, einer Datennutzlast aus benutzerdefinierten Feldern oder einer Nachricht mit beiden Arten von Nutzlast senden. Weitere Informationen finden Sie unter Nachrichtentypen.
Die Beispiele auf dieser Seite zeigen, wie Sie Benachrichtigungen mit der Firebase Admin SDK (die Unterstützung für Node, Java, Python, C# und Go bietet) und dem HTTP-Protokoll v1 senden.
Nachrichten an bestimmte Geräte senden
Wenn Sie die Nachricht an ein einzelnes, bestimmtes Gerät senden möchten, übergeben Sie das Registrierungstoken des Geräts wie unten gezeigt. Weitere Informationen zu Registrierungstokens finden Sie in den Informationen zur Client-Einrichtung für Ihre Plattform.
Node.js
// This registration token comes from the client FCM SDKs.
const registrationToken = 'YOUR_REGISTRATION_TOKEN';

const message = {
  data: {
    score: '850',
    time: '2:45'
  },
  token: registrationToken
};

// Send a message to the device corresponding to the provided
// registration token.
getMessaging().send(message)
  .then((response) => {
    // Response is a message ID string.
    console.log('Successfully sent message:', response);
  })
  .catch((error) => {
    console.log('Error sending message:', error);
  });
Java
// This registration token comes from the client FCM SDKs.
String registrationToken = "YOUR_REGISTRATION_TOKEN";
// See documentation on defining a message payload.
Message message = Message.builder()
.putData("score", "850")
.putData("time", "2:45")
.setToken(registrationToken)
.build();
// Send a message to the device corresponding to the provided
// registration token.
String response = FirebaseMessaging.getInstance().send(message);
// Response is a message ID string.
System.out.println("Successfully sent message: " + response);
Python
# This registration token comes from the client FCM SDKs.
registration_token = 'YOUR_REGISTRATION_TOKEN'
# See documentation on defining a message payload.
message = messaging.Message(
data={
'score': '850',
'time': '2:45',
},
token=registration_token,
)
# Send a message to the device corresponding to the provided
# registration token.
response = messaging.send(message)
# Response is a message ID string.
print('Successfully sent message:', response)
Go
// Obtain a messaging.Client from the App.
ctx := context.Background()
client, err := app.Messaging(ctx)
if err != nil {
log.Fatalf("error getting Messaging client: %v\n", err)
}
// This registration token comes from the client FCM SDKs.
registrationToken := "YOUR_REGISTRATION_TOKEN"
// See documentation on defining a message payload.
message := &messaging.Message{
Data: map[string]string{
"score": "850",
"time": "2:45",
},
Token: registrationToken,
}
// Send a message to the device corresponding to the provided
// registration token.
response, err := client.Send(ctx, message)
if err != nil {
log.Fatalln(err)
}
// Response is a message ID string.
fmt.Println("Successfully sent message:", response)
C#
// This registration token comes from the client FCM SDKs.
var registrationToken = "YOUR_REGISTRATION_TOKEN";

// See documentation on defining a message payload.
var message = new Message()
{
    Data = new Dictionary<string, string>()
    {
        { "score", "850" },
        { "time", "2:45" },
    },
    Token = registrationToken,
};

// Send a message to the device corresponding to the provided
// registration token.
string response = await FirebaseMessaging.DefaultInstance.SendAsync(message);
// Response is a message ID string.
Console.WriteLine("Successfully sent message: " + response);
REST
POST https://fcm.googleapis.com/v1/projects/myproject-b5ae1/messages:send HTTP/1.1

Content-Type: application/json
Authorization: Bearer ya29.ElqKBGN2Ri_Uz...HnS_uNreA

{
   "message":{
      "token":"bk3RNwTe3H0:CI2k_HHwgIpoDKCIZvvDMExUdFQ3P1...",
      "notification":{
        "body":"This is an FCM notification message!",
        "title":"FCM Message"
      }
   }
}
cURL-Befehl:
curl -X POST -H "Authorization: Bearer ya29.ElqKBGN2Ri_Uz...HnS_uNreA" -H "Content-Type: application/json" -d '{
"message":{
   "notification":{
     "title":"FCM Message",
     "body":"This is an FCM Message"
   },
   "token":"bk3RNwTe3H0:CI2k_HHwgIpoDKCIZvvDMExUdFQ3P1..."
}}' https://fcm.googleapis.com/v1/projects/myproject-b5ae1/messages:send
Bei Erfolg gibt jede Sendemethode eine Nachrichten-ID zurück. Der Firebase Admin SDK gibt den ID-String im Format projects/{project_id}/messages/{message_id} zurück.
Die HTTP-Protokollantwort ist ein einzelner JSON-Schlüssel:
    {
      "name":"projects/myproject-b5ae1/messages/0:1500415314455276%31bd1c9631bd1c96"
    }
Eine Nachricht an mehrere Geräte senden
Mit den Admin FCM SDKs können Sie eine Nachricht an eine Liste von Geräteregistrierungstokens senden. Sie können diese Funktion verwenden, wenn Sie dieselbe Nachricht an eine große Anzahl von Geräten senden müssen. Sie können bis zu 500 Geräteregistrierungstokens pro Aufruf angeben.
Der Rückgabewert enthält eine Liste von Tokens, die der Reihenfolge der Eingabetokens entspricht. Das ist nützlich, wenn Sie prüfen möchten, bei welchen Tokens Fehler aufgetreten sind, und diese dann entsprechend behandeln möchten.
Node.js
// These registration tokens come from the client FCM SDKs.
const registrationTokens = [
  'YOUR_REGISTRATION_TOKEN_1',
  // …
  'YOUR_REGISTRATION_TOKEN_N',
];

const message = {
  data: {score: '850', time: '2:45'},
  tokens: registrationTokens,
};

getMessaging().sendEachForMulticast(message)
  .then((response) => {
    if (response.failureCount > 0) {
      const failedTokens = [];
      response.responses.forEach((resp, idx) => {
        if (!resp.success) {
          failedTokens.push(registrationTokens[idx]);
        }
      });
      console.log('List of tokens that caused failures: ' + failedTokens);
    }
  });
Java
// These registration tokens come from the client FCM SDKs.
List<String> registrationTokens = Arrays.asList(
"YOUR_REGISTRATION_TOKEN_1",
// ...
"YOUR_REGISTRATION_TOKEN_n"
);
MulticastMessage message = MulticastMessage.builder()
.putData("score", "850")
.putData("time", "2:45")
.addAllTokens(registrationTokens)
.build();
BatchResponse response = FirebaseMessaging.getInstance().sendEachForMulticast(message);
if (response.getFailureCount() > 0) {
List<SendResponse> responses = response.getResponses();
List<String> failedTokens = new ArrayList<>();
for (int i = 0; i < responses.size(); i++) {
if (!responses.get(i).isSuccessful()) {
// The order of responses corresponds to the order of the registration tokens.
failedTokens.add(registrationTokens.get(i));
}
}
System.out.println("List of tokens that caused failures: " + failedTokens);
}
Python
# These registration tokens come from the client FCM SDKs.
registration_tokens = [
'YOUR_REGISTRATION_TOKEN_1',
# ...
'YOUR_REGISTRATION_TOKEN_N',
]
message = messaging.MulticastMessage(
data={'score': '850', 'time': '2:45'},
tokens=registration_tokens,
)
response = messaging.send_each_for_multicast(message)
if response.failure_count > 0:
responses = response.responses
failed_tokens = []
for idx, resp in enumerate(responses):
if not resp.success:
# The order of responses corresponds to the order of the registration tokens.
failed_tokens.append(registration_tokens[idx])
print(f'List of tokens that caused failures: {failed_tokens}')
Go
// Create a list containing up to 500 registration tokens.
// This registration tokens come from the client FCM SDKs.
registrationTokens := []string{
"YOUR_REGISTRATION_TOKEN_1",
// ...
"YOUR_REGISTRATION_TOKEN_n",
}
message := &messaging.MulticastMessage{
Data: map[string]string{
"score": "850",
"time": "2:45",
},
Tokens: registrationTokens,
}
br, err := client.SendEachForMulticast(context.Background(), message)
if err != nil {
log.Fatalln(err)
}
if br.FailureCount > 0 {
var failedTokens []string
for idx, resp := range br.Responses {
if !resp.Success {
// The order of responses corresponds to the order of the registration tokens.
failedTokens = append(failedTokens, registrationTokens[idx])
}
}
fmt.Printf("List of tokens that caused failures: %v\n", failedTokens)
}
C#
// These registration tokens come from the client FCM SDKs.
var registrationTokens = new List<string>()
{
"YOUR_REGISTRATION_TOKEN_1",
// ...
"YOUR_REGISTRATION_TOKEN_n",
};
var message = new MulticastMessage()
{
Tokens = registrationTokens,
Data = new Dictionary<string, string>()
{
{ "score", "850" },
{ "time", "2:45" },
},
};
var response = await FirebaseMessaging.DefaultInstance.SendEachForMulticastAsync(message);
if (response.FailureCount > 0)
{
var failedTokens = new List<string>();
for (var i = 0; i < response.Responses.Count; i++)
{
if (!response.Responses[i].IsSuccess)
{
// The order of responses corresponds to the order of the registration tokens.
failedTokens.Add(registrationTokens[i]);
}
}
Console.WriteLine($"List of tokens that caused failures: {failedTokens}");
}
Liste von Nachrichten senden
Mit den Admin-SDKs können Sie eine Liste mit bis zu 500 Nachrichten senden. Mit dieser Funktion können Sie einen benutzerdefinierten Satz von Nachrichten erstellen und an verschiedene Empfänger senden, darunter Themen oder bestimmte Geräteregistrierungstokens. Sie können diese Funktion beispielsweise verwenden, wenn Sie leicht unterschiedliche Botschaften an verschiedene Zielgruppen senden müssen.
Node.js
// Create a list containing up to 500 messages.
const messages = [];
messages.push({
  notification: { title: 'Price drop', body: '5% off all electronics' },
  token: registrationToken,
});
messages.push({
  notification: { title: 'Price drop', body: '2% off all books' },
  topic: 'readers-club',
});

getMessaging().sendEach(messages)
  .then((response) => {
    console.log(response.successCount + ' messages were sent successfully');
  });
Java
// Create a list containing up to 500 messages.
List<Message> messages = Arrays.asList(
Message.builder()
.setNotification(Notification.builder()
.setTitle("Price drop")
.setBody("5% off all electronics")
.build())
.setToken(registrationToken)
.build(),
// ...
Message.builder()
.setNotification(Notification.builder()
.setTitle("Price drop")
.setBody("2% off all books")
.build())
.setTopic("readers-club")
.build()
);
BatchResponse response = FirebaseMessaging.getInstance().sendEach(messages);
// See the BatchResponse reference documentation
// for the contents of response.
System.out.println(response.getSuccessCount() + " messages were sent successfully");
Python
# Create a list containing up to 500 messages.
messages = [
messaging.Message(
notification=messaging.Notification('Price drop', '5% off all electronics'),
token=registration_token,
),
# ...
messaging.Message(
notification=messaging.Notification('Price drop', '2% off all books'),
topic='readers-club',
),
]
response = messaging.send_each(messages)
# See the BatchResponse reference documentation
# for the contents of response.
print(f'{response.success_count} messages were sent successfully')
Go
// Create a list containing up to 500 messages.
messages := []*messaging.Message{
{
Notification: &messaging.Notification{
Title: "Price drop",
Body: "5% off all electronics",
},
Token: registrationToken,
},
{
Notification: &messaging.Notification{
Title: "Price drop",
Body: "2% off all books",
},
Topic: "readers-club",
},
}
br, err := client.SendEach(context.Background(), messages)
if err != nil {
log.Fatalln(err)
}
// See the BatchResponse reference documentation
// for the contents of response.
fmt.Printf("%d messages were sent successfully\n", br.SuccessCount)
C#
// Create a list containing up to 500 messages.
var messages = new List<Message>()
{
new Message()
{
Notification = new Notification()
{
Title = "Price drop",
Body = "5% off all electronics",
},
Token = registrationToken,
},
new Message()
{
Notification = new Notification()
{
Title = "Price drop",
Body = "2% off all books",
},
Topic = "readers-club",
},
};
var response = await FirebaseMessaging.DefaultInstance.SendEachAsync(messages);
// See the BatchResponse reference documentation
// for the contents of response.
Console.WriteLine($"{response.SuccessCount} messages were sent successfully");
Nachrichten an Themen senden
Nachdem Sie ein Thema erstellt haben, entweder indem Sie Client-App-Instanzen auf Clientseite oder über die Server-API für das Thema registriert haben, können Sie Nachrichten an das Thema senden. Wenn Sie zum ersten Mal Sendeanfragen für FCM erstellen, finden Sie im Leitfaden zu Ihrer Serverumgebung und FCM wichtige Hintergrundinformationen und Informationen zur Einrichtung.
Geben Sie in Ihrer Sendelogik im Backend den gewünschten Themennamen wie unten gezeigt an:
Node.js
// The topic name can be optionally prefixed with "/topics/".
const topic = 'highScores';

const message = {
  data: {
    score: '850',
    time: '2:45'
  },
  topic: topic
};

// Send a message to devices subscribed to the provided topic.
getMessaging().send(message)
  .then((response) => {
    // Response is a message ID string.
    console.log('Successfully sent message:', response);
  })
  .catch((error) => {
    console.log('Error sending message:', error);
  });
Java
// The topic name can be optionally prefixed with "/topics/".
String topic = "highScores";
// See documentation on defining a message payload.
Message message = Message.builder()
.putData("score", "850")
.putData("time", "2:45")
.setTopic(topic)
.build();
// Send a message to the devices subscribed to the provided topic.
String response = FirebaseMessaging.getInstance().send(message);
// Response is a message ID string.
System.out.println("Successfully sent message: " + response);
Python
# The topic name can be optionally prefixed with "/topics/".
topic = 'highScores'
# See documentation on defining a message payload.
message = messaging.Message(
data={
'score': '850',
'time': '2:45',
},
topic=topic,
)
# Send a message to the devices subscribed to the provided topic.
response = messaging.send(message)
# Response is a message ID string.
print('Successfully sent message:', response)
Go
// The topic name can be optionally prefixed with "/topics/".
topic := "highScores"
// See documentation on defining a message payload.
message := &messaging.Message{
Data: map[string]string{
"score": "850",
"time": "2:45",
},
Topic: topic,
}
// Send a message to the devices subscribed to the provided topic.
response, err := client.Send(ctx, message)
if err != nil {
log.Fatalln(err)
}
// Response is a message ID string.
fmt.Println("Successfully sent message:", response)
C#
// The topic name can be optionally prefixed with "/topics/".
var topic = "highScores";

// See documentation on defining a message payload.
var message = new Message()
{
    Data = new Dictionary<string, string>()
    {
        { "score", "850" },
        { "time", "2:45" },
    },
    Topic = topic,
};

// Send a message to the devices subscribed to the provided topic.
string response = await FirebaseMessaging.DefaultInstance.SendAsync(message);
// Response is a message ID string.
Console.WriteLine("Successfully sent message: " + response);
REST
POST https://fcm.googleapis.com/v1/projects/myproject-b5ae1/messages:send HTTP/1.1

Content-Type: application/json
Authorization: Bearer ya29.ElqKBGN2Ri_Uz...HnS_uNreA
{
  "message":{
    "topic" : "foo-bar",
    "notification" : {
      "body" : "This is a Firebase Cloud Messaging Topic Message!",
      "title" : "FCM Message"
      }
   }
}
cURL-Befehl:
curl -X POST -H "Authorization: Bearer ya29.ElqKBGN2Ri_Uz...HnS_uNreA" -H "Content-Type: application/json" -d '{
  "message": {
    "topic" : "foo-bar",
    "notification": {
      "body": "This is a Firebase Cloud Messaging Topic Message!",
      "title": "FCM Message"
    }
  }
}' https://fcm.googleapis.com/v1/projects/myproject-b5ae1/messages:send HTTP/1.1
Wenn Sie eine Nachricht an eine Kombination von Themen senden möchten, geben Sie eine Bedingung an. Das ist ein boolescher Ausdruck, der die Zielthemen angibt. Mit der folgenden Bedingung werden Nachrichten beispielsweise an Geräte gesendet, die TopicA und entweder TopicB oder TopicC abonniert haben:
"'TopicA' in topics && ('TopicB' in topics || 'TopicC' in topics)"
Bei FCM werden zuerst alle Bedingungen in Klammern und dann der Ausdruck von links nach rechts ausgewertet. Im obigen Ausdruck erhält ein Nutzer, der ein einzelnes Thema abonniert hat, die Nachricht nicht. Ebenso erhält ein Nutzer, der TopicA nicht abonniert hat, die Nachricht nicht. Bei diesen Kombinationen ist sie enthalten:
TopicAundTopicBTopicAundTopicC
Sie können bis zu fünf Themen in Ihren bedingten Ausdruck aufnehmen.
An eine Bedingung senden:
Node.js
// Define a condition which will send to devices which are subscribed
// to either the Google stock or the tech industry topics.
const condition = '\'stock-GOOG\' in topics || \'industry-tech\' in topics';

// See documentation on defining a message payload.
const message = {
  notification: {
    title: '$FooCorp up 1.43% on the day',
    body: '$FooCorp gained 11.80 points to close at 835.67, up 1.43% on the day.'
  },
  condition: condition
};

// Send a message to devices subscribed to the combination of topics
// specified by the provided condition.
getMessaging().send(message)
  .then((response) => {
    // Response is a message ID string.
    console.log('Successfully sent message:', response);
  })
  .catch((error) => {
    console.log('Error sending message:', error);
  });
Java
// Define a condition which will send to devices which are subscribed
// to either the Google stock or the tech industry topics.
String condition = "'stock-GOOG' in topics || 'industry-tech' in topics";
// See documentation on defining a message payload.
Message message = Message.builder()
.setNotification(Notification.builder()
.setTitle("$GOOG up 1.43% on the day")
.setBody("$GOOG gained 11.80 points to close at 835.67, up 1.43% on the day.")
.build())
.setCondition(condition)
.build();
// Send a message to devices subscribed to the combination of topics
// specified by the provided condition.
String response = FirebaseMessaging.getInstance().send(message);
// Response is a message ID string.
System.out.println("Successfully sent message: " + response);
Python
# Define a condition which will send to devices which are subscribed
# to either the Google stock or the tech industry topics.
condition = "'stock-GOOG' in topics || 'industry-tech' in topics"
# See documentation on defining a message payload.
message = messaging.Message(
notification=messaging.Notification(
title='$GOOG up 1.43% on the day',
body='$GOOG gained 11.80 points to close at 835.67, up 1.43% on the day.',
),
condition=condition,
)
# Send a message to devices subscribed to the combination of topics
# specified by the provided condition.
response = messaging.send(message)
# Response is a message ID string.
print('Successfully sent message:', response)
Go
// Define a condition which will send to devices which are subscribed
// to either the Google stock or the tech industry topics.
condition := "'stock-GOOG' in topics || 'industry-tech' in topics"
// See documentation on defining a message payload.
message := &messaging.Message{
Data: map[string]string{
"score": "850",
"time": "2:45",
},
Condition: condition,
}
// Send a message to devices subscribed to the combination of topics
// specified by the provided condition.
response, err := client.Send(ctx, message)
if err != nil {
log.Fatalln(err)
}
// Response is a message ID string.
fmt.Println("Successfully sent message:", response)
C#
// Define a condition which will send to devices which are subscribed
// to either the Google stock or the tech industry topics.
var condition = "'stock-GOOG' in topics || 'industry-tech' in topics";

// See documentation on defining a message payload.
var message = new Message()
{
    Notification = new Notification()
    {
        Title = "$GOOG up 1.43% on the day",
        Body = "$GOOG gained 11.80 points to close at 835.67, up 1.43% on the day.",
    },
    Condition = condition,
};

// Send a message to devices subscribed to the combination of topics
// specified by the provided condition.
string response = await FirebaseMessaging.DefaultInstance.SendAsync(message);
// Response is a message ID string.
Console.WriteLine("Successfully sent message: " + response);
REST
POST https://fcm.googleapis.com/v1/projects/myproject-b5ae1/messages:send HTTP/1.1

Content-Type: application/json
Authorization: Bearer ya29.ElqKBGN2Ri_Uz...HnS_uNreA
{
   "message":{
    "condition": "'dogs' in topics || 'cats' in topics",
    "notification" : {
      "body" : "This is a Firebase Cloud Messaging Topic Message!",
      "title" : "FCM Message",
    }
  }
}
cURL-Befehl:
curl -X POST -H "Authorization: Bearer ya29.ElqKBGN2Ri_Uz...HnS_uNreA" -H "Content-Type: application/json" -d '{
  "notification": {
    "title": "FCM Message",
    "body": "This is a Firebase Cloud Messaging Topic Message!",
  },
  "condition": "'dogs' in topics || 'cats' in topics"
}' https://fcm.googleapis.com/v1/projects/myproject-b5ae1/messages:send HTTP/1.1
Nachrichten an Gerätegruppen senden
Das Senden von Nachrichten an eine Gerätegruppe ähnelt dem Senden von Nachrichten an ein einzelnes Gerät. Dabei wird dieselbe Methode zum Autorisieren von Sendeanfragen verwendet. Setzen Sie das Feld token auf den Benachrichtigungsschlüssel der Gruppe:
REST
POST https://fcm.googleapis.com/v1/projects/myproject-b5ae1/messages:send HTTP/1.1

Content-Type: application/json
Authorization: Bearer ya29.ElqKBGN2Ri_Uz...HnS_uNreA

{
   "message":{
      "token":"APA91bGHXQBB...9QgnYOEURwm0I3lmyqzk2TXQ",
      "data":{
        "hello": "This is a Firebase Cloud Messaging device group message!"
      }
   }
}
cURL-Befehl
curl -X POST -H "Authorization: Bearer ya29.ElqKBGN2Ri_Uz...HnS_uNreA" -H "Content-Type: application/json" -d '{
"message":{
   "data":{
     "hello": "This is a Firebase Cloud Messaging device group message!"
   },
   "token":"APA91bGHXQBB...9QgnYOEURwm0I3lmyqzk2TXQ"
}}' https://fcm.googleapis.com/v1/projects/myproject-b5ae1/messages:send
Direktstartfähige Nachrichten senden (nur Android)
Sie können Nachrichten an Geräte im Direct Boot-Modus senden, indem Sie die HTTP v1- oder die Legacy-HTTP-APIs verwenden. Bevor Sie Nachrichten an Geräte im Direct Boot-Modus senden, müssen Sie die Schritte ausführen, um Clientgeräte für den Empfang von FCM-Nachrichten im Direct Boot-Modus zu aktivieren.
Senden über die FCM v1 HTTP API
Die Nachrichtenanfrage muss den Schlüssel "direct_boot_ok" : true in den AndroidConfig-Optionen des Anfragetexts enthalten. Beispiel:
https://fcm.googleapis.com/v1/projects/myproject-b5ae1/messages:send
Content-Type:application/json
Authorization: Bearer ya29.ElqKBGN2Ri_Uz...HnS_uNreA

{
  "message":{
    "token" : "bk3RNwTe3H0:CI2k_HHwgIpoDKCIZvvDMExUdFQ3P1..."
    "data": {
      "score": "5x1",
      "time": "15:10"
    },
    "android": {
      "direct_boot_ok": true,
    },
}
Nachrichten plattformübergreifend anpassen
Sowohl mit Firebase Admin SDK als auch mit dem FCM v1-HTTP-Protokoll können Sie in Ihren Nachrichtenanfragen alle Felder festlegen, die im message-Objekt verfügbar sind. Dazu zählen:
- einen gemeinsamen Satz von Feldern, die von allen App-Instanzen interpretiert werden, die die Nachricht empfangen.
- plattformspezifische Feldgruppen wie
AndroidConfigundWebpushConfig, die nur von App-Instanzen interpretiert werden, die auf der angegebenen Plattform ausgeführt werden.
Plattformspezifische Blöcke bieten Ihnen die Flexibilität, Nachrichten für verschiedene Plattformen anzupassen, damit sie bei Erhalt richtig verarbeitet werden. Das FCM-Backend berücksichtigt alle angegebenen Parameter und passt die Nachricht für jede Plattform an.
Wann sollten gemeinsame Felder verwendet werden?
Verwenden Sie allgemeine Felder, wenn Sie:
- Targeting auf App-Instanzen auf allen Plattformen – Apple, Android und Web
- Nachrichten an Themen senden
Alle App-Instanzen, unabhängig von der Plattform, können die folgenden gemeinsamen Felder interpretieren:
Wann sollten plattformspezifische Felder verwendet werden?
Verwenden Sie plattformspezifische Felder, wenn Sie:
- Felder nur an bestimmte Plattformen senden
- Plattformspezifische Felder zusätzlich zu den gemeinsamen Feldern senden
Wenn Sie Werte nur an bestimmte Plattformen senden möchten, verwenden Sie keine gemeinsamen Felder, sondern plattformspezifische Felder. Wenn Sie beispielsweise eine Benachrichtigung nur an Apple-Plattformen und das Web, aber nicht an Android senden möchten, müssen Sie zwei separate Gruppen von Feldern verwenden, eine für Apple und eine für das Web.
Wenn Sie Nachrichten mit bestimmten Zustellungsoptionen senden, verwenden Sie plattformspezifische Felder, um diese festzulegen. Sie können bei Bedarf unterschiedliche Werte für die einzelnen Plattformen angeben. Auch wenn Sie im Grunde denselben Wert für alle Plattformen festlegen möchten, müssen Sie plattformspezifische Felder verwenden. Das liegt daran, dass jede Plattform den Wert möglicherweise etwas anders interpretiert. Unter Android wird die Gültigkeitsdauer beispielsweise als Ablaufzeit in Sekunden festgelegt, während sie bei Apple als Ablaufdatum festgelegt wird.
Beispiel: Benachrichtigung mit Farb- und Symboloptionen
In diesem Beispiel wird ein gemeinsamer Benachrichtigungstitel und ‑inhalt an alle Plattformen gesendet, aber auch einige plattformspezifische Überschreibungen an Android-Geräte.
Bei Android wird in der Anfrage ein spezielles Symbol und eine spezielle Farbe für die Anzeige auf Android-Geräten festgelegt. Wie in der Referenz für AndroidNotification beschrieben, wird die Farbe im Format #rrggbb angegeben und das Bild muss eine lokale Drawable-Symbolressource der Android-App sein.
Hier sehen Sie eine ungefähre Darstellung des visuellen Effekts auf dem Gerät eines Nutzers:
![]()
Node.js
const topicName = 'industry-tech';

const message = {
  notification: {
    title: '`$FooCorp` up 1.43% on the day',
    body: 'FooCorp gained 11.80 points to close at 835.67, up 1.43% on the day.'
  },
  android: {
    notification: {
      icon: 'stock_ticker_update',
      color: '#7e55c3'
    }
  },
  topic: topicName,
};

getMessaging().send(message)
  .then((response) => {
    // Response is a message ID string.
    console.log('Successfully sent message:', response);
  })
  .catch((error) => {
    console.log('Error sending message:', error);
  });
Java
Message message = Message.builder()
.setNotification(Notification.builder()
.setTitle("$GOOG up 1.43% on the day")
.setBody("$GOOG gained 11.80 points to close at 835.67, up 1.43% on the day.")
.build())
.setAndroidConfig(AndroidConfig.builder()
.setTtl(3600 * 1000)
.setNotification(AndroidNotification.builder()
.setIcon("stock_ticker_update")
.setColor("#f45342")
.build())
.build())
.setApnsConfig(ApnsConfig.builder()
.setAps(Aps.builder()
.setBadge(42)
.build())
.build())
.setTopic("industry-tech")
.build();
Python
message = messaging.Message(
notification=messaging.Notification(
title='$GOOG up 1.43% on the day',
body='$GOOG gained 11.80 points to close at 835.67, up 1.43% on the day.',
),
android=messaging.AndroidConfig(
ttl=datetime.timedelta(seconds=3600),
priority='normal',
notification=messaging.AndroidNotification(
icon='stock_ticker_update',
color='#f45342'
),
),
apns=messaging.APNSConfig(
payload=messaging.APNSPayload(
aps=messaging.Aps(badge=42),
),
),
topic='industry-tech',
)
Go
oneHour := time.Duration(1) * time.Hour
badge := 42
message := &messaging.Message{
Notification: &messaging.Notification{
Title: "$GOOG up 1.43% on the day",
Body: "$GOOG gained 11.80 points to close at 835.67, up 1.43% on the day.",
},
Android: &messaging.AndroidConfig{
TTL: &oneHour,
Notification: &messaging.AndroidNotification{
Icon: "stock_ticker_update",
Color: "#f45342",
},
},
APNS: &messaging.APNSConfig{
Payload: &messaging.APNSPayload{
Aps: &messaging.Aps{
Badge: &badge,
},
},
},
Topic: "industry-tech",
}
C#
var message = new Message
{
Notification = new Notification()
{
Title = "$GOOG up 1.43% on the day",
Body = "$GOOG gained 11.80 points to close at 835.67, up 1.43% on the day.",
},
Android = new AndroidConfig()
{
TimeToLive = TimeSpan.FromHours(1),
Notification = new AndroidNotification()
{
Icon = "stock_ticker_update",
Color = "#f45342",
},
},
Apns = new ApnsConfig()
{
Aps = new Aps()
{
Badge = 42,
},
},
Topic = "industry-tech",
};
REST
POST https://fcm.googleapis.com/v1/projects/myproject-b5ae1/messages:send HTTP/1.1

Content-Type: application/json
Authorization: Bearer ya29.ElqKBGN2Ri_Uz...HnS_uNreA
{
  "message":{
     "topic":"industry-tech",
     "notification":{
       "title":"`$FooCorp` up 1.43% on the day",
       "body":"FooCorp gained 11.80 points to close at 835.67, up 1.43% on the day."
     },
     "android":{
       "notification":{
         "icon":"stock_ticker_update",
         "color":"#7e55c3"
       }
     }
   }
 }
Die vollständigen Details zu den Schlüsseln, die in plattformspezifischen Blöcken im Nachrichtentext verfügbar sind, finden Sie in der HTTP v1-Referenzdokumentation.
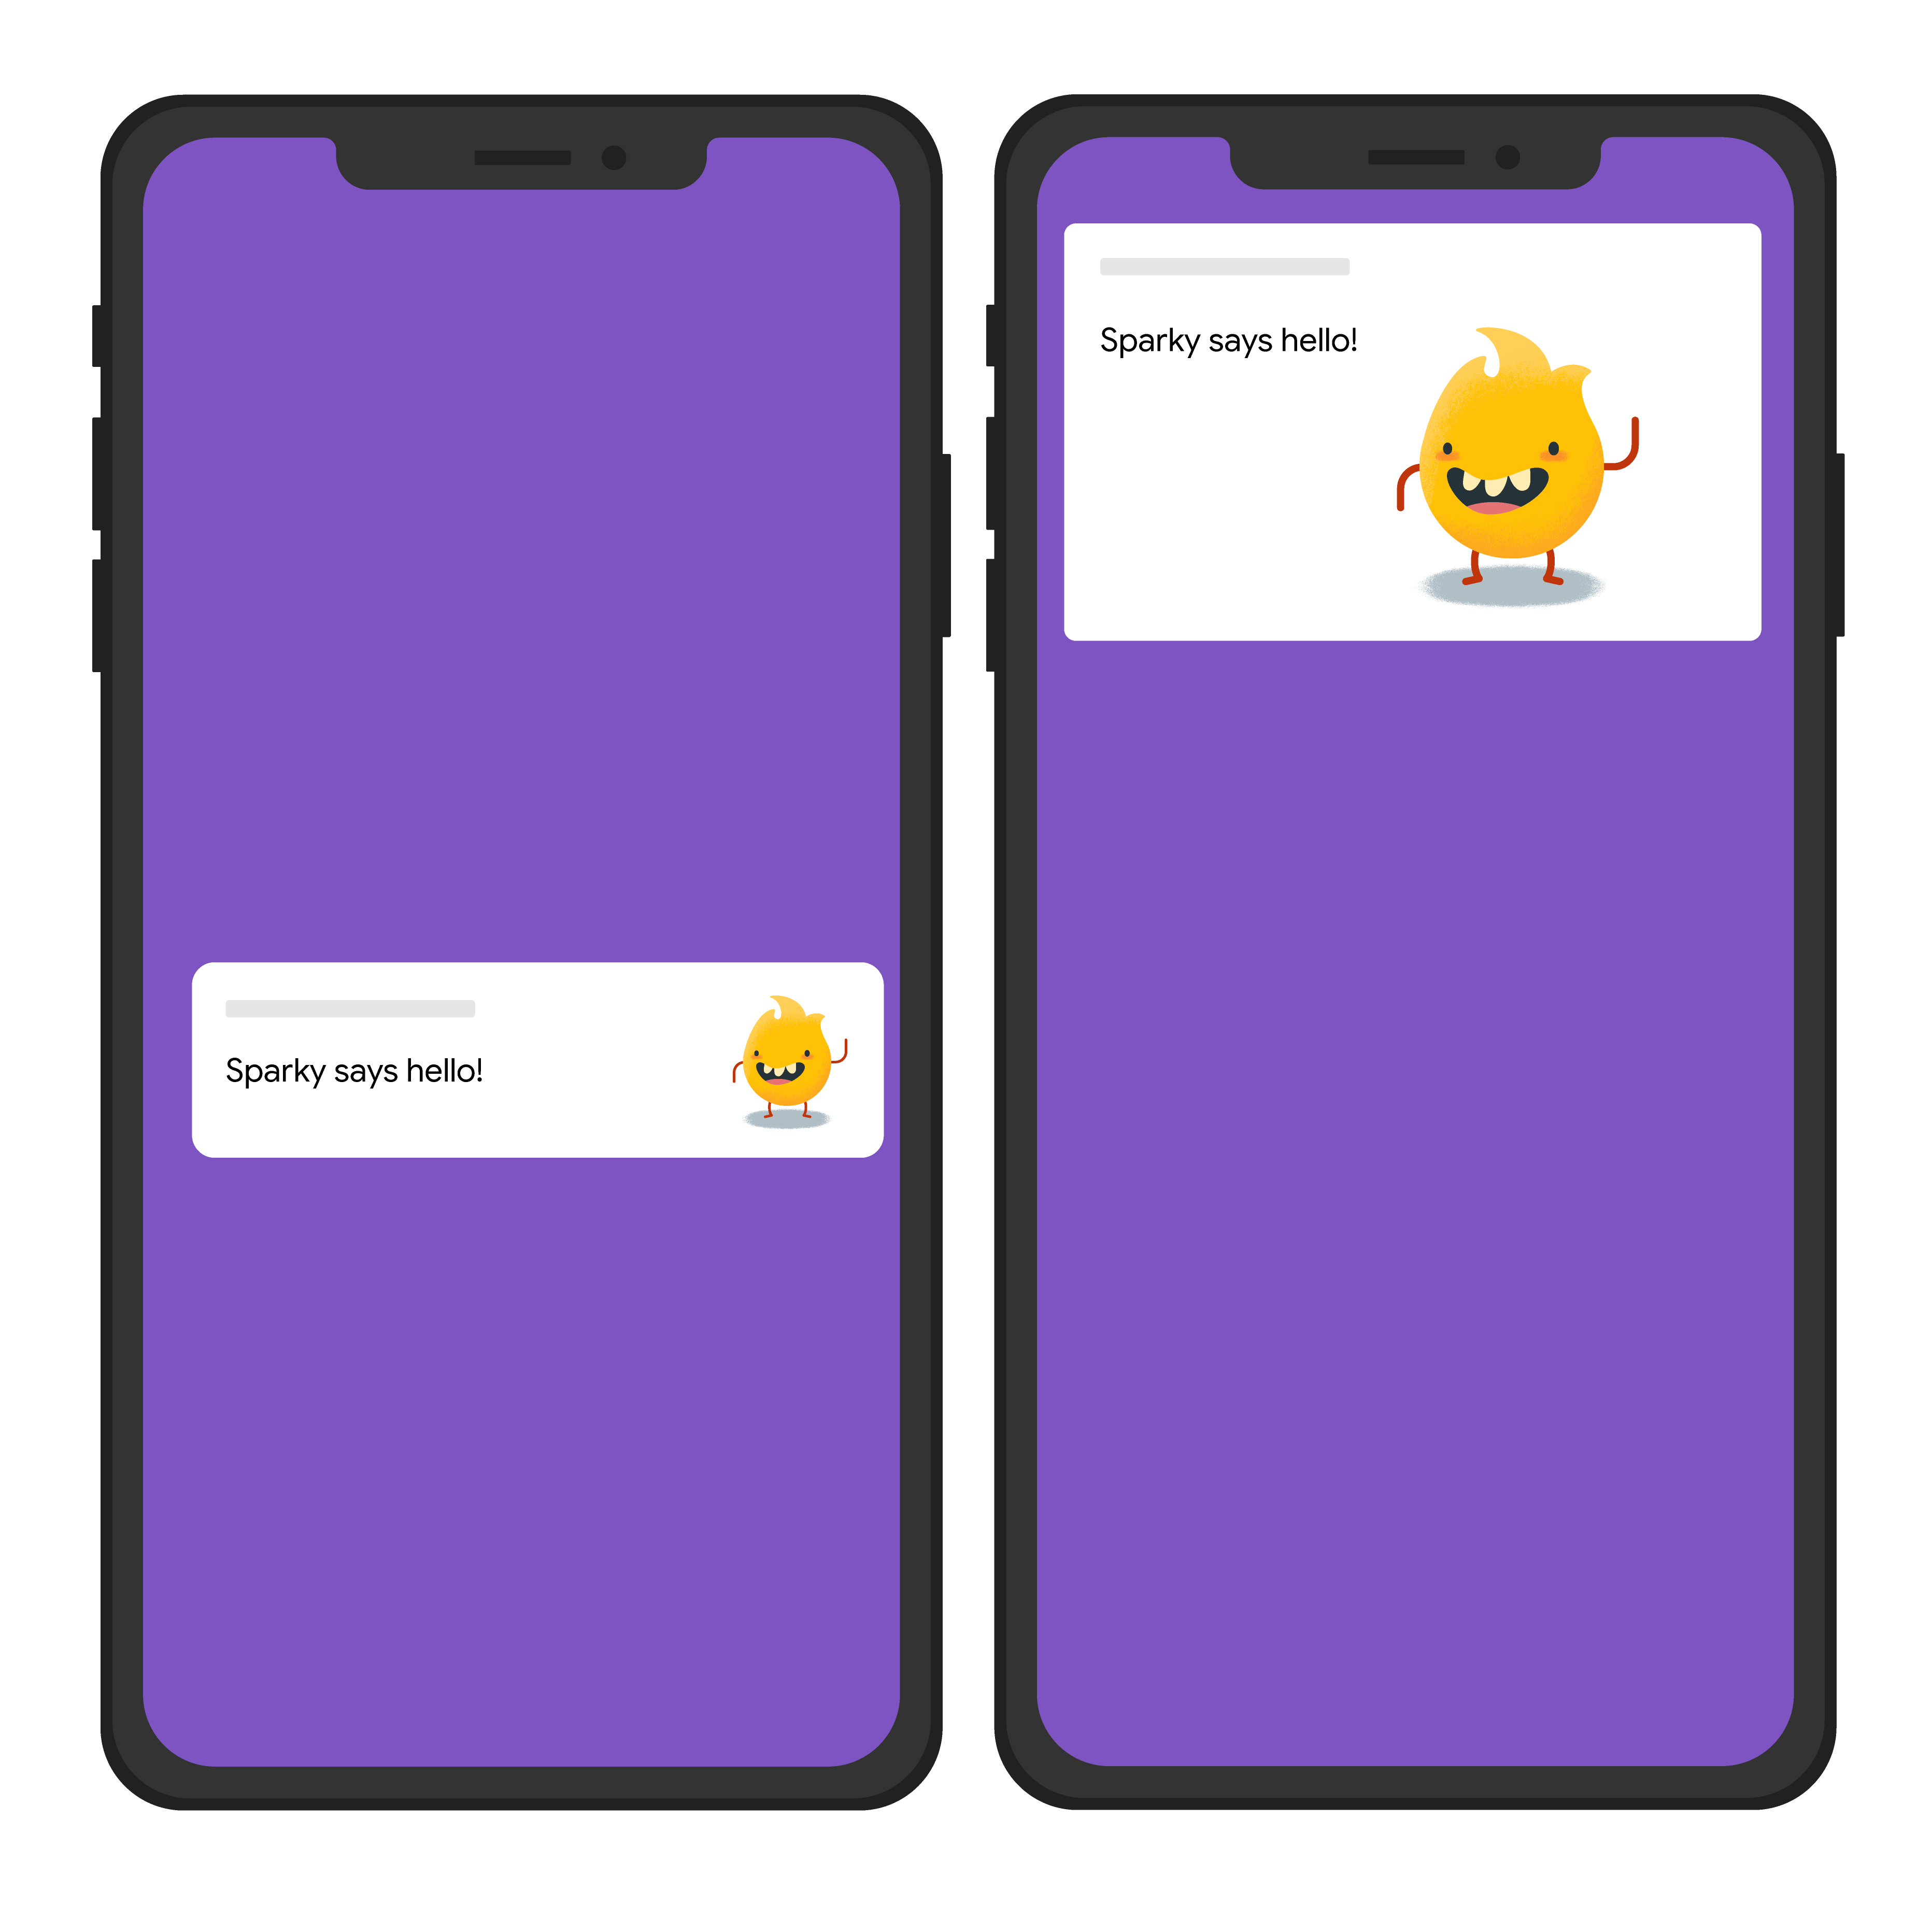
Beispiel: Benachrichtigung mit einem benutzerdefinierten Bild
Im folgenden Beispiel wird eine Anfrage gesendet, die einen gemeinsamen Benachrichtigungstitel an alle Plattformen sendet, aber auch ein Bild. Hier sehen Sie eine ungefähre Darstellung des visuellen Effekts auf dem Gerät eines Nutzers:
Node.js
const topicName = 'industry-tech';

const message = {
  notification: {
    title: 'Sparky says hello!'
  },
  android: {
    notification: {
      imageUrl: 'https://foo.bar.pizza-monster.png'
    }
  },
  apns: {
    payload: {
      aps: {
        'mutable-content': 1
      }
    },
    fcm_options: {
      image: 'https://foo.bar.pizza-monster.png'
    }
  },
  webpush: {
    headers: {
      image: 'https://foo.bar.pizza-monster.png'
    }
  },
  topic: topicName,
};

getMessaging().send(message)
  .then((response) => {
    // Response is a message ID string.
    console.log('Successfully sent message:', response);
  })
  .catch((error) => {
    console.log('Error sending message:', error);
  });
REST
POST https://fcm.googleapis.com/v1/projects/myproject-b5ae1/messages:send HTTP/1.1

Content-Type: application/json
Authorization: Bearer ya29.ElqKBGN2Ri_Uz...HnS_uNreA
{
  "message":{
     "topic":"industry-tech",
     "notification":{
       "title":"Sparky says hello!",
     },
     "android":{
       "notification":{
         "image":"https://foo.bar/pizza-monster.png"
       }
     },
     "apns":{
       "payload":{
         "aps":{
           "mutable-content":1
         }
       },
       "fcm_options": {
           "image":"https://foo.bar/pizza-monster.png"
       }
     },
     "webpush":{
       "headers":{
         "image":"https://foo.bar/pizza-monster.png"
       }
     }
   }
 }
Die vollständigen Details zu den Schlüsseln, die in plattformspezifischen Blöcken im Nachrichtentext verfügbar sind, finden Sie in der HTTP v1-Referenzdokumentation.
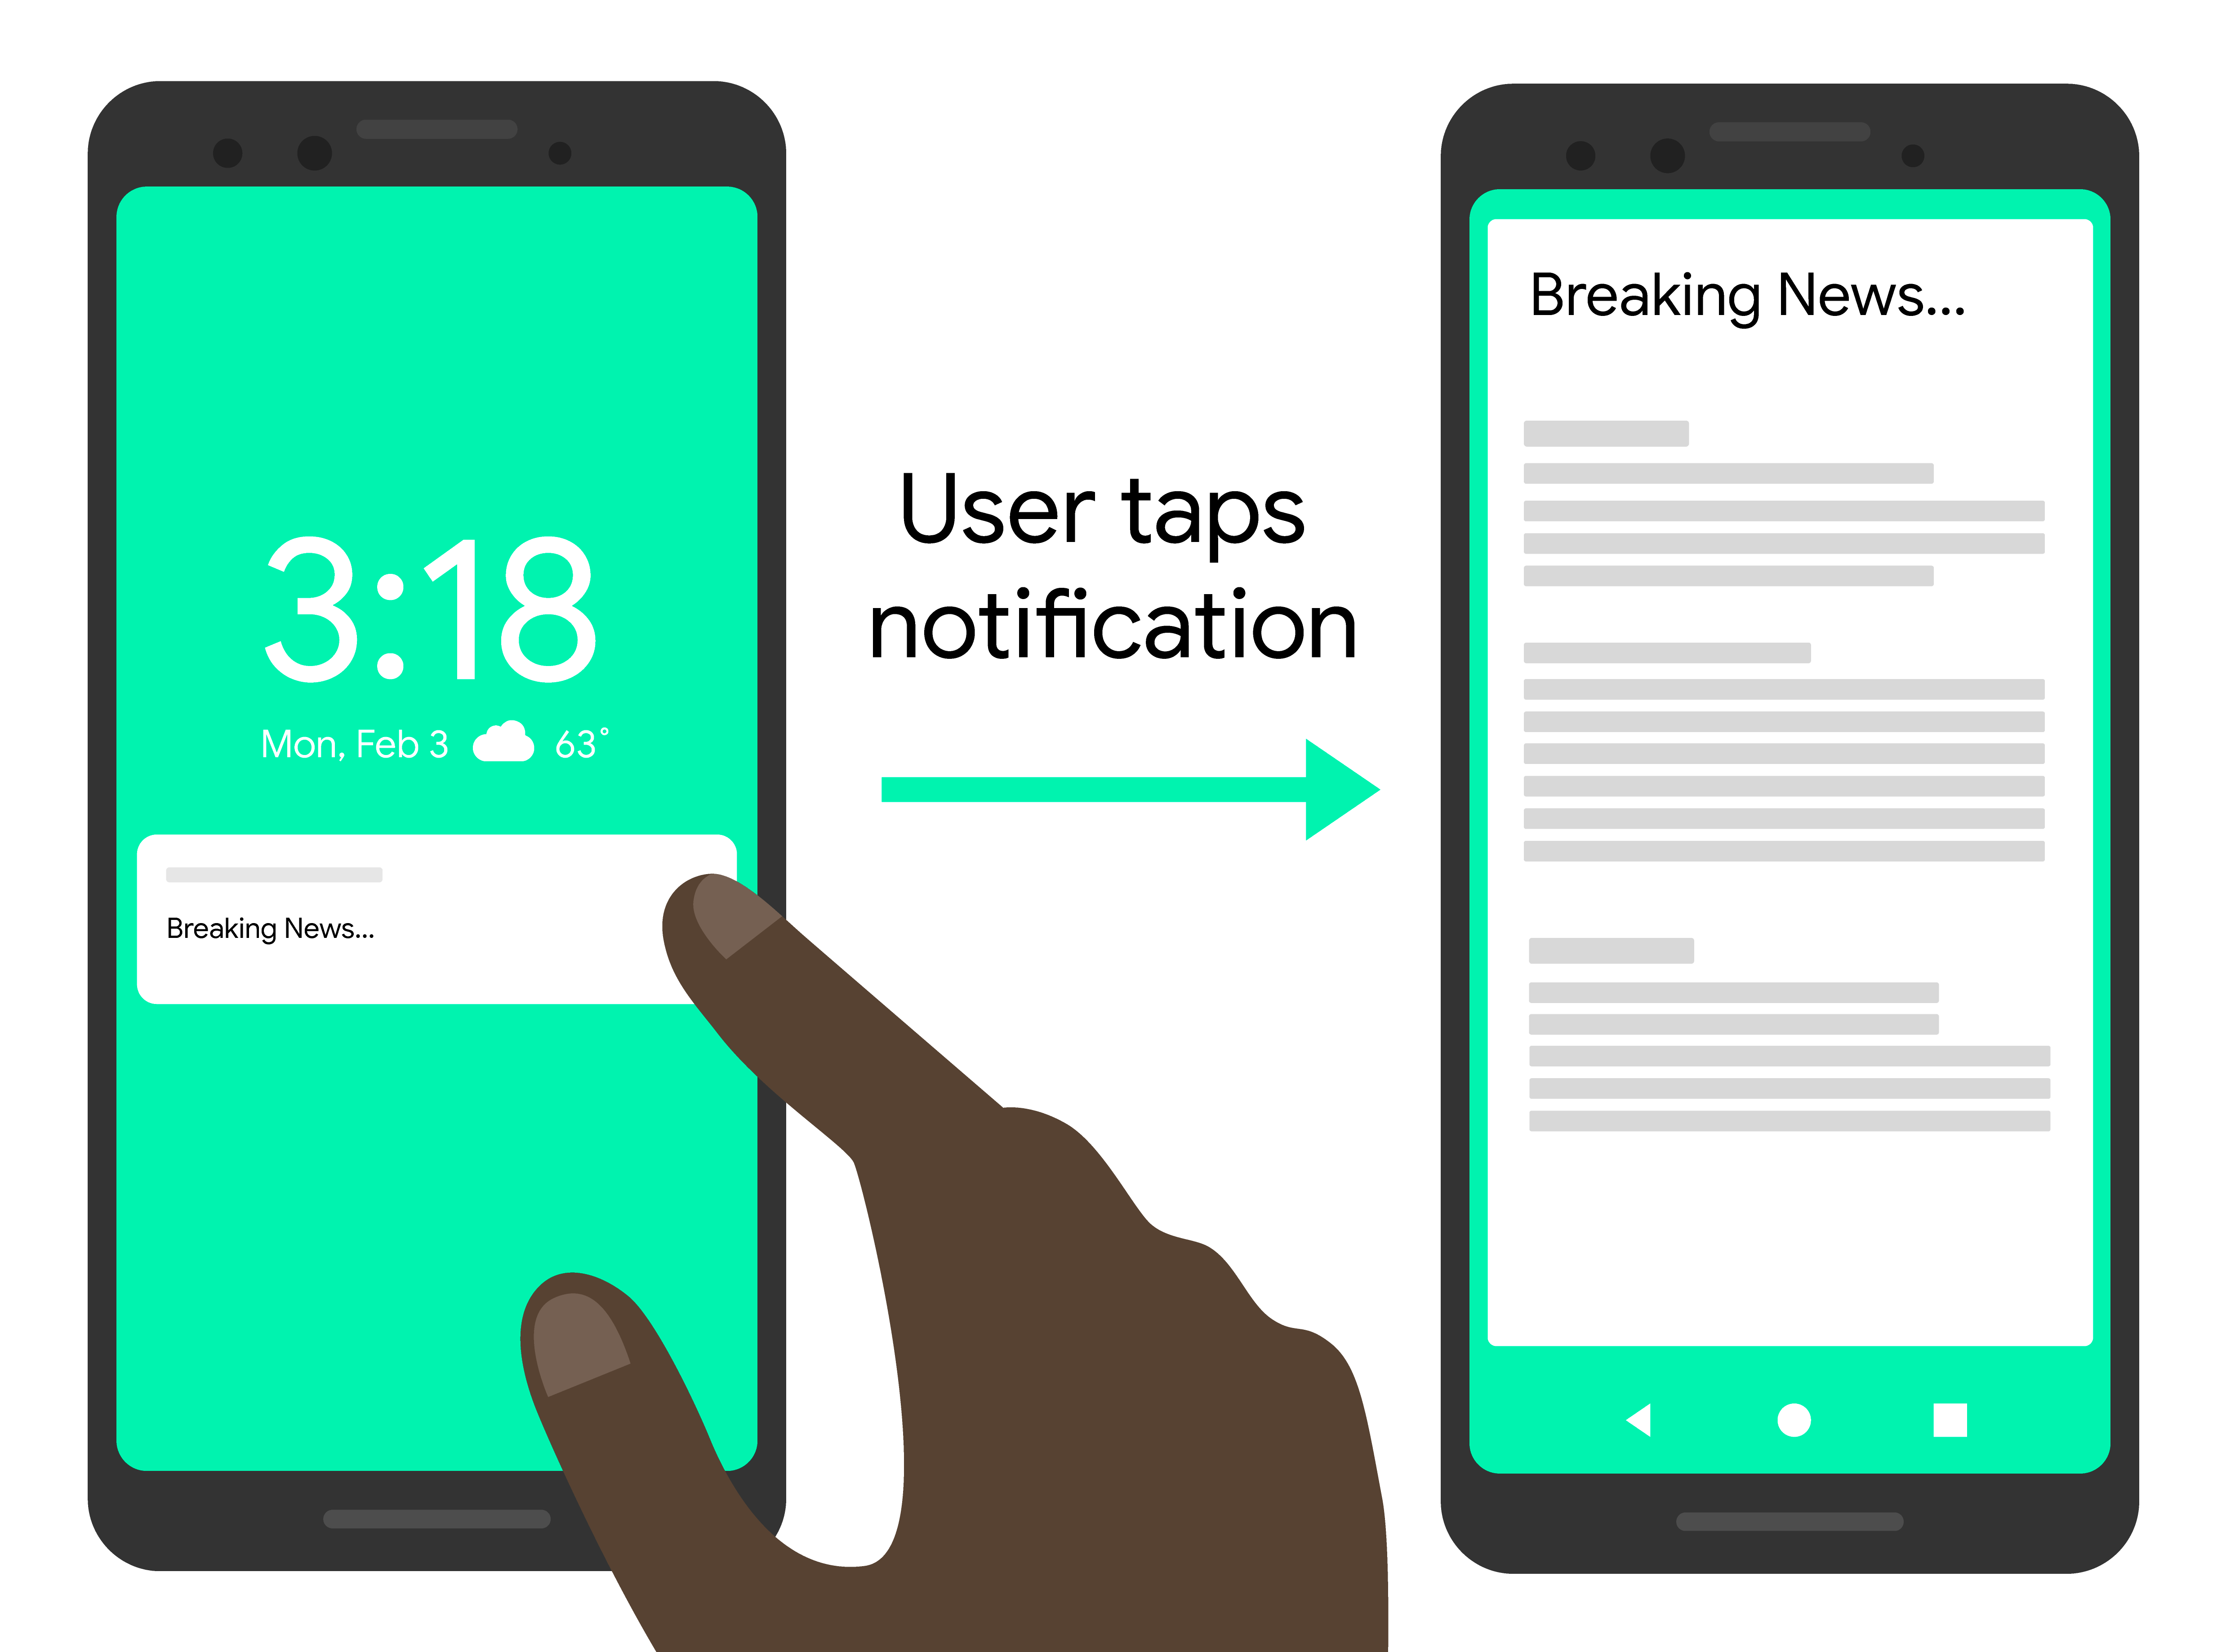
Beispiel: Benachrichtigung mit einer zugehörigen Klickaktion
Im folgenden Beispiel wird ein allgemeiner Benachrichtigungstitel an alle Plattformen gesendet. Außerdem wird eine Aktion gesendet, die die App ausführen soll, wenn der Nutzer mit der Benachrichtigung interagiert. Hier sehen Sie eine ungefähre Darstellung des visuellen Effekts auf dem Gerät eines Nutzers:
Node.js
const topicName = 'industry-tech';

const message = {
  notification: {
    title: 'Breaking News....'
  },
  android: {
    notification: {
      clickAction: 'news_intent'
    }
  },
  apns: {
    payload: {
      aps: {
        'category': 'INVITE_CATEGORY'
      }
    }
  },
  webpush: {
    fcmOptions: {
      link: 'breakingnews.html'
    }
  },
  topic: topicName,
};

getMessaging().send(message)
  .then((response) => {
    // Response is a message ID string.
    console.log('Successfully sent message:', response);
  })
  .catch((error) => {
    console.log('Error sending message:', error);
  });
REST
POST https://fcm.googleapis.com/v1/projects/myproject-b5ae1/messages:send HTTP/1.1

Content-Type: application/json
Authorization: Bearer ya29.ElqKBGN2Ri_Uz...HnS_uNreA
{
  "message":{
     "topic":"industry-tech",
     "notification":{
       "title":"Breaking News...",
     },
     "android":{
       "notification":{
         "click_action":"news_intent"
       }
     },
     "apns":{
       "payload":{
         "aps":{
           "category" : "INVITE_CATEGORY"
         }
       },
     },
     "webpush":{
       "fcm_options":{
         "link":"breakingnews.html"
       }
     }
   }
 }
Die vollständigen Details zu den Schlüsseln, die in plattformspezifischen Blöcken im Nachrichtentext verfügbar sind, finden Sie in der HTTP v1-Referenzdokumentation.
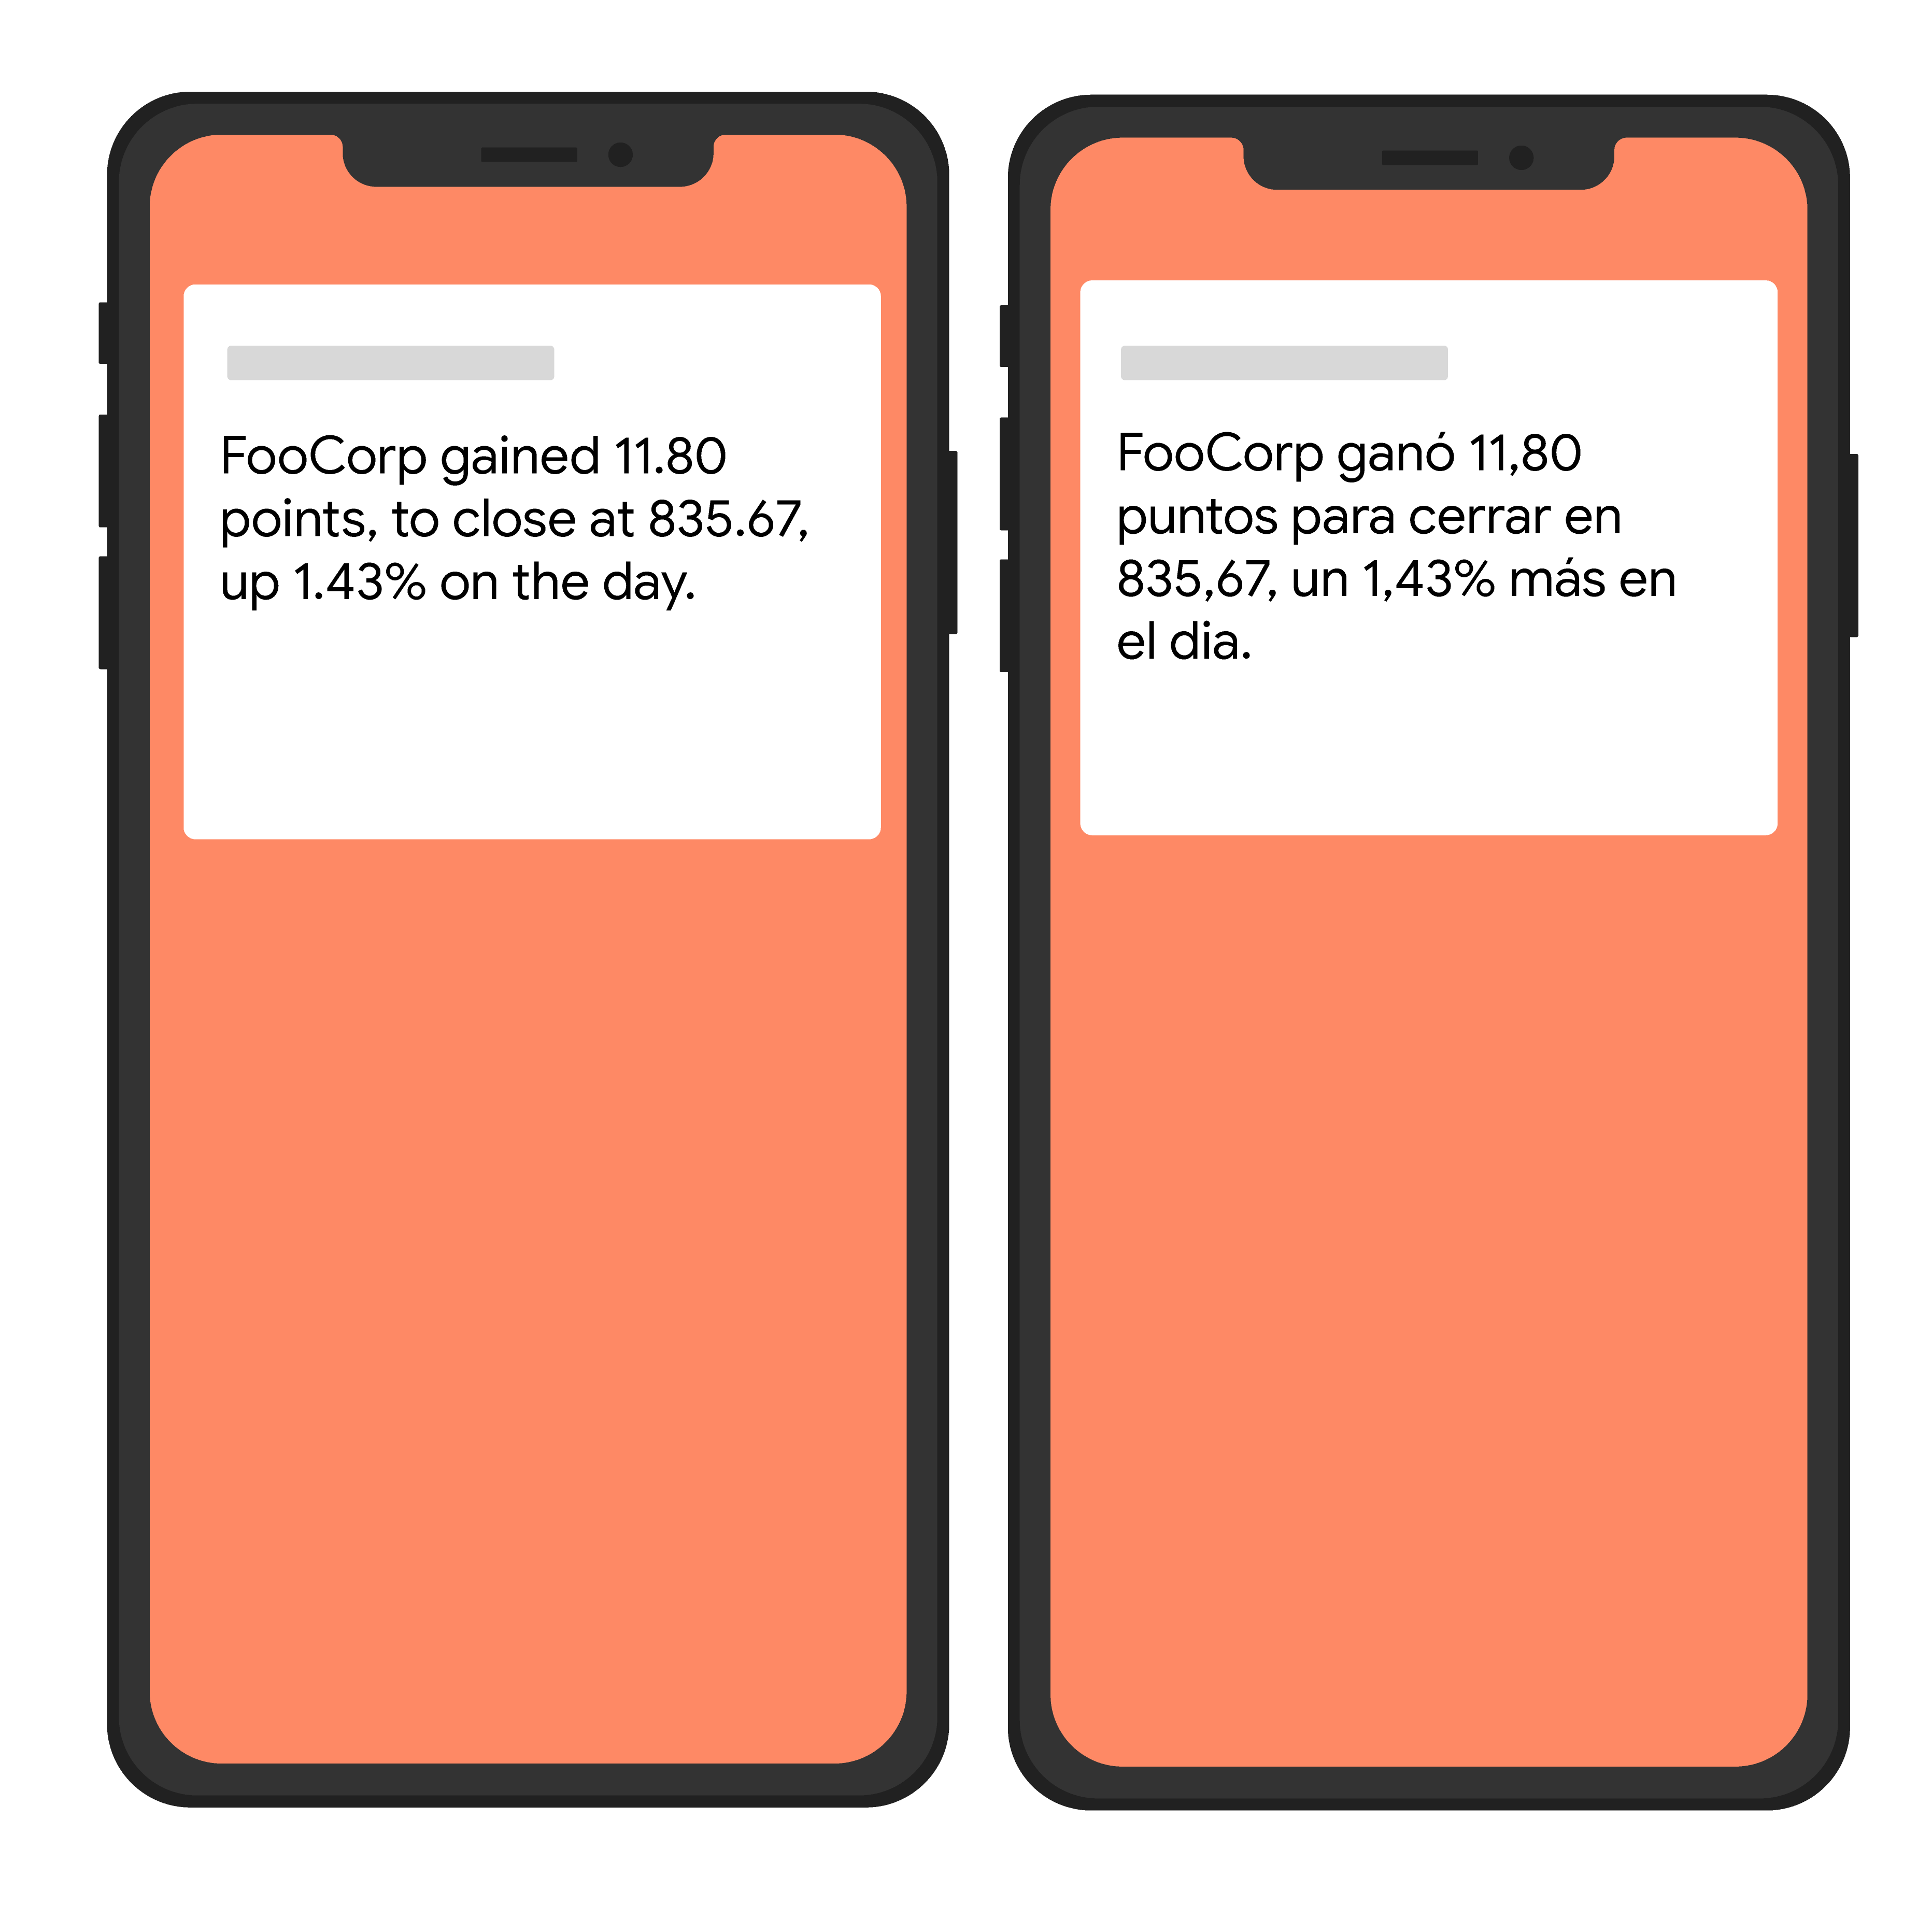
Beispiel: Benachrichtigung mit Lokalisierungsoptionen
Im folgenden Beispiel wird eine Send-Anfrage gesendet, die Lokalisierungsoptionen für den Client enthält, damit lokalisierte Nachrichten angezeigt werden. Hier sehen Sie eine ungefähre Darstellung des visuellen Effekts auf dem Gerät eines Nutzers:
Node.js
var topicName = 'industry-tech';

var message = {
  android: {
    ttl: 3600000,
    notification: {
      bodyLocKey: 'STOCK_NOTIFICATION_BODY',
      bodyLocArgs: ['FooCorp', '11.80', '835.67', '1.43']
    }
  },
  apns: {
    payload: {
      aps: {
        alert: {
          locKey: 'STOCK_NOTIFICATION_BODY',
          locArgs: ['FooCorp', '11.80', '835.67', '1.43']
        }
      }
    }
  },
  topic: topicName,
};

getMessaging().send(message)
  .then((response) => {
    // Response is a message ID string.
    console.log('Successfully sent message:', response);
  })
  .catch((error) => {
    console.log('Error sending message:', error);
  });
REST
POST https://fcm.googleapis.com/v1/projects/myproject-b5ae1/messages:send HTTP/1.1

Content-Type: application/json
Authorization: Bearer ya29.ElqKBGN2Ri_Uz...HnS_uNreA
{
  "message":{
             "topic":"Tech",
             "android":{
               "ttl":"3600s",
               "notification":{
                 "body_loc_key": "STOCK_NOTIFICATION_BODY",
                 "body_loc_args":  ["FooCorp", "11.80", "835.67", "1.43"],
               },
             },
             "apns":{
               "payload":{
                 "aps":{
                   "alert" : {
                     "loc-key": "STOCK_NOTIFICATION_BODY",
                     "loc-args":  ["FooCorp", "11.80", "835.67", "1.43"],
                    },
                 },
               },
             },
  },
}'
Die vollständigen Details zu den Schlüsseln, die in plattformspezifischen Blöcken im Nachrichtentext verfügbar sind, finden Sie in der HTTP v1-Referenzdokumentation.