
プロンプト エンジニアリングは、アプリ デベロッパーが生成 AI モデルの出力に影響を与える主要な方法です。たとえば、LLM を使用する場合は、モデルのレスポンスのトーン、形式、長さなどの特性に影響を与えるプロンプトを作成できます。
これらのプロンプトの作成方法は、使用しているモデルによって異なります。1 つのモデル用に作成されたプロンプトを別のモデルで使用すると、パフォーマンスが低下する可能性があります。同様に、設定するモデル パラメータ(Temperature、Top-K など)も、モデルによって出力に異なる影響を与えます。
モデル、モデル パラメータ、プロンプトの 3 つの要素をすべて組み合わせて目的の出力を生成することは、簡単なプロセスではありません。多くの場合、大幅な反復処理とテストが必要になります。Genkit には、この反復処理をより迅速かつ便利にすることを目的とした Dotprompt というライブラリとファイル形式が用意されています。
Dotprompt は、「プロンプトはコードである」という考え方で設計されています。プロンプトは、アプリケーション コードとは別に、対象のモデルとモデル パラメータとともに定義します。その後、デベロッパー(またはアプリケーション コードの作成に携わっていないユーザー)は、Genkit デベロッパー UI を使用して、プロンプトとモデル パラメータを迅速に反復処理できます。プロンプトが意図したとおりに動作したら、プロンプトをアプリケーションにインポートし、Genkit を使用して実行できます。
プロンプトの定義は、それぞれ .prompt 拡張子のファイルに格納します。これらのファイルの例を次に示します。
---
model: googleai/gemini-1.5-flash
config:
  temperature: 0.9
input:
  schema:
    location: string
    style?: string
    name?: string
  default:
    location: a restaurant
---

You are the world's most welcoming AI assistant and are currently working at {{location}}.

Greet a guest{{#if name}} named {{name}}{{/if}}{{#if style}} in the style of {{style}}{{/if}}.
3 つのダッシュで囲まれた部分は、GitHub Markdown と Jekyll で使用される frontmatter 形式に似た YAML フロントマターです。ファイルの残りの部分はプロンプトです。必要に応じて Handlebars テンプレートを使用できます。以降のセクションでは、.prompt ファイルを構成する各部分とその使用方法について詳しく説明します。
始める前に
このページを読む前に、AI モデルによるコンテンツの生成のページで説明されている内容を理解しておく必要があります。
このページのコードサンプルを実行する場合は、まずスタートガイドの手順を完了してください。すべての例では、プロジェクトに依存関係として Genkit がすでにインストールされていることを前提としています。
プロンプト ファイルの作成
Dotprompt には、プロンプトを作成して読み込むためのさまざまな方法が用意されていますが、1 つのディレクトリ(またはそのサブディレクトリ)内にプロンプトを .prompt ファイルとして整理するプロジェクト用に最適化されています。このセクションでは、この推奨設定を使用してプロンプトを作成して読み込む方法について説明します。
プロンプト ディレクトリを作成する
Dotprompt ライブラリは、プロジェクトのルートにあるディレクトリにプロンプトが存在することを想定しており、そこにあるプロンプトを自動的に読み込みます。デフォルトでは、このディレクトリの名前は prompts です。たとえば、デフォルトのディレクトリ名を使用すると、プロジェクト構造は次のようになります。
your-project/
├── prompts/
│   └── hello.prompt
├── main.go
├── go.mod
└── go.sum
別のディレクトリを使用する場合は、Genkit の構成時に指定します。
g, err := genkit.Init(ctx.Background(), ai.WithPromptDir("./llm_prompts"))
プロンプト ファイルの作成
.prompt ファイルを作成するには、テキスト エディタを使用する方法と、デベロッパー UI を使用する方法の 2 つがあります。
テキスト エディタを使用する
テキスト エディタを使用してプロンプト ファイルを作成する場合は、プロンプト ディレクトリに .prompt 拡張子のテキスト ファイルを作成します(例: prompts/hello.prompt)。
プロンプト ファイルの最小限の例を次に示します。
---
model: vertexai/gemini-1.5-flash
---
You are the world's most welcoming AI assistant. Greet the user and offer your assistance.
ダッシュで囲まれた部分は、GitHub マークダウンと Jekyll で使用されるフロントマター形式に似た YAML フロントマターです。ファイルの残りの部分はプロンプトです。必要に応じて、Handlebars テンプレートを使用できます。フロントマターのセクションは省略可能ですが、ほとんどのプロンプト ファイルには、少なくともモデルを指定するメタデータが含まれています。このページの後半では、これを足掛かりに、プロンプト ファイルで Dotprompt の機能を利用する方法について説明します。
デベロッパー UI の使用
デベロッパー UI のモデルランナーを使用してプロンプト ファイルを作成することもできます。まず、Genkit ライブラリをインポートし、目的のモデル プラグインを使用するように構成するアプリケーション コードから始めます。次に例を示します。
import (
    "context"

    "github.com/firebase/genkit/go/ai"
    "github.com/firebase/genkit/go/genkit"
    "github.com/firebase/genkit/go/plugins/googlegenai"
)

func main() {
    g, err := genkit.Init(context.Background(), ai.WithPlugins(&googlegenai.GoogleAI{}))
    if err != nil {
        log.Fatal(err)
    }

    // Blocks end of program execution to use the developer UI.
    select {}
}
ファイルに他のコードが含まれていてもかまいませんが、必要なのは上記のコードのみです。
同じプロジェクトでデベロッパー UI を読み込みます。
genkit start -- go run .[モデル] セクションで、プラグインから提供されるモデルのリストから使用するモデルを選択します。
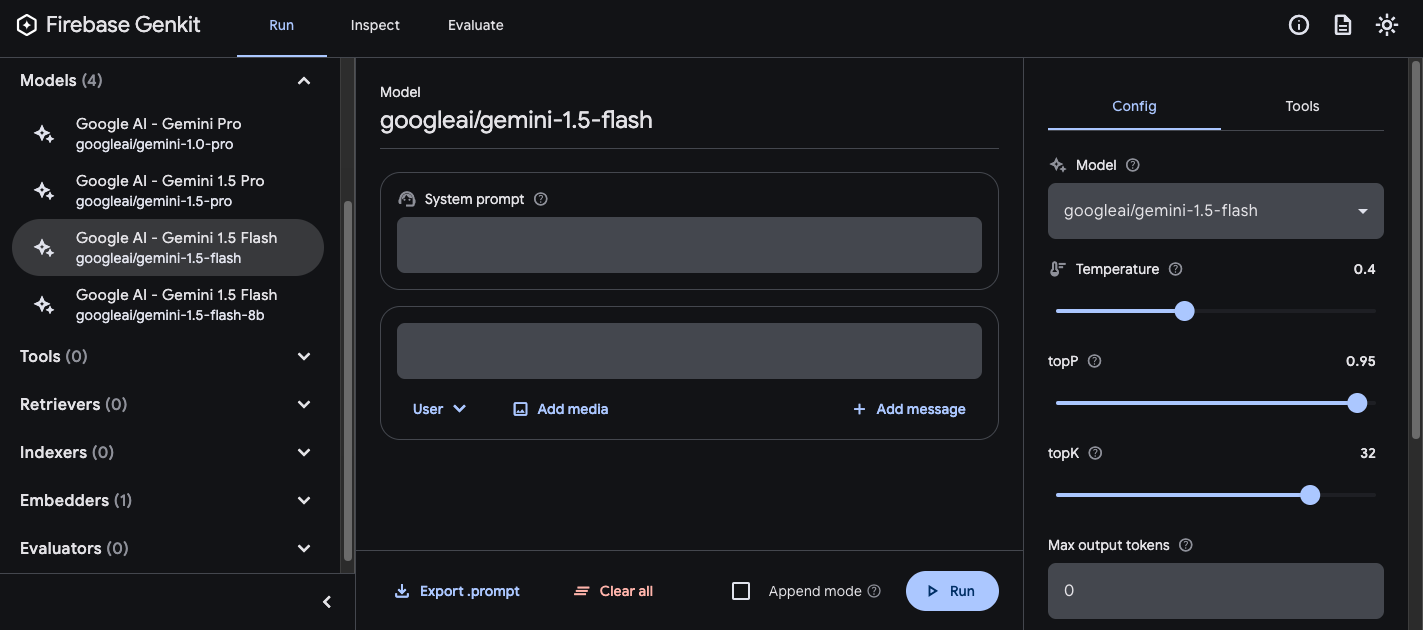
満足のいく結果が得られるまで、プロンプトと構成をテストします。準備ができたら、[エクスポート] ボタンを押して、ファイルをプロンプト ディレクトリに保存します。
プロンプトの実行
プロンプト ファイルを作成したら、アプリケーション コードから、または Genkit が提供するツールを使用して実行できます。プロンプトの実行方法にかかわらず、まず、Genkit ライブラリと目的のモデル プラグインをインポートするアプリケーション コードから始めます。次に例を示します。
import (
    "context"

      "github.com/firebase/genkit/go/ai"
    "github.com/firebase/genkit/go/genkit"
    "github.com/firebase/genkit/go/plugins/googlegenai"
)

func main() {
    g, err := genkit.Init(context.Background(), ai.WithPlugins(&googlegenai.GoogleAI{}))
    if err != nil {
        log.Fatal(err)
    }

    // Blocks end of program execution to use the developer UI.
    select {}
}
ファイルに他のコードが含まれていてもかまいませんが、必要なのは上記のコードのみです。プロンプトをデフォルト以外のディレクトリに保存する場合は、Genkit の構成時にそのディレクトリを指定してください。
コードからプロンプトを実行する
プロンプトを使用するには、まず genkit.LookupPrompt() 関数を使用してプロンプトを読み込みます。
helloPrompt := genkit.LookupPrompt(g, "hello")
実行可能プロンプトには genkit.Generate() と同様のオプションが用意されており、入力(入力スキーマの指定の下のセクションを参照)、構成など、多くのオプションは実行時にオーバーライドできます。
resp, err := helloPrompt.Execute(context.Background(),
    ai.WithModelName("googleai/gemini-2.0-flash"),
    ai.WithInput(map[string]any{"name": "John"}),
    ai.WithConfig(&googlegenai.GeminiConfig{Temperature: 0.5})
)
プロンプト呼び出しに渡すパラメータは、プロンプト ファイルで指定された同じパラメータをオーバーライドします。
使用可能なオプションの説明については、AI モデルでコンテンツを生成するをご覧ください。
デベロッパー UI の使用
アプリのプロンプトを調整する際に、Genkit デベロッパー UI でプロンプトを実行すると、アプリケーション コードとは別に、プロンプトとモデル構成をすばやく反復処理できます。
プロジェクト ディレクトリからデベロッパー UI を読み込みます。
genkit start -- go run .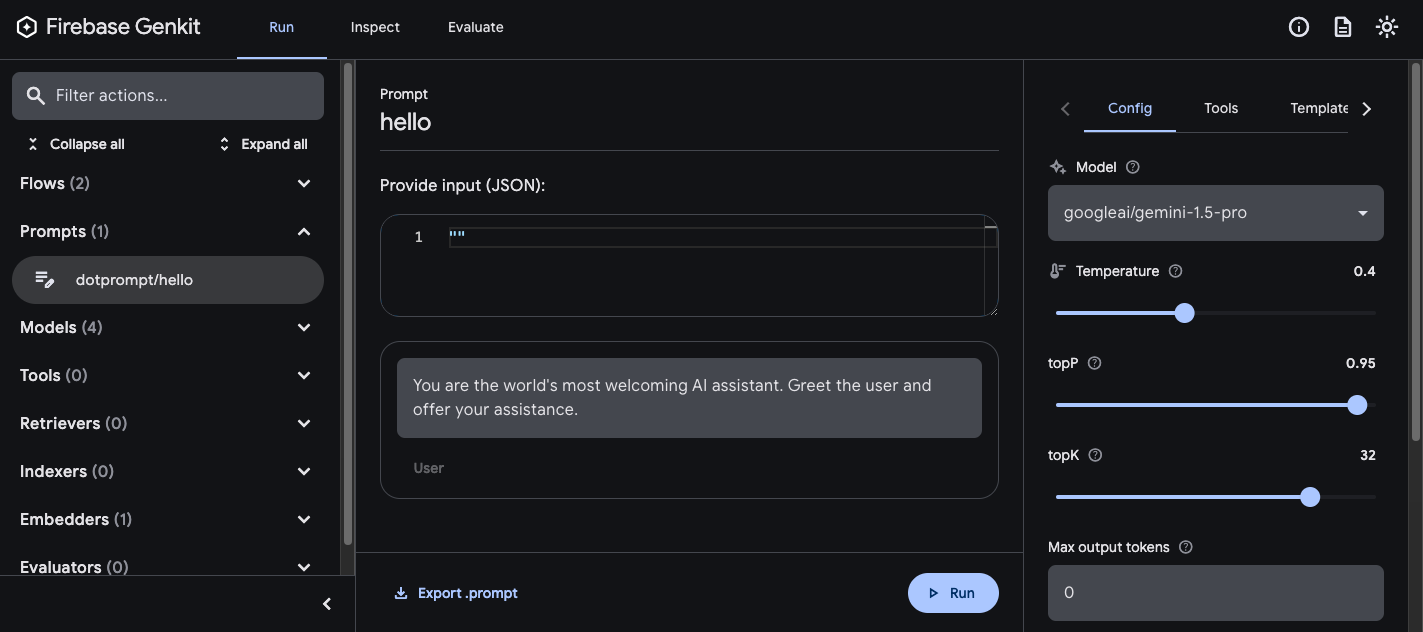
プロンプトをデベロッパー UI に読み込んだら、さまざまな入力値でプロンプトを実行し、プロンプトの文言や構成パラメータの変更がモデルの出力にどのように影響するかをテストできます。結果に満足したら、[プロンプトをエクスポート] ボタンをクリックして、変更したプロンプトをプロジェクト ディレクトリに保存します。
モデル設定
プロンプト ファイルのフロントマター ブロックで、必要に応じてプロンプトのモデル構成値を指定できます。
---
model: googleai/gemini-2.0-flash
config:
  temperature: 1.4
  topK: 50
  topP: 0.4
  maxOutputTokens: 400
  stopSequences:
    -   "<end>"
    -   "<fin>"
---
これらの値は、実行可能プロンプトで受け入れられる WithConfig() オプションに直接マッピングされます。
resp, err := helloPrompt.Execute(context.Background(),
    ai.WithConfig(&googlegenai.GeminiConfig{
        Temperature:     1.4,
        TopK:            50,
        TopP:            0.4,
        MaxOutputTokens: 400,
        StopSequences:   []string{"<end>", "<fin>"},
    }))
使用可能なオプションの説明については、AI モデルでコンテンツを生成するをご覧ください。
入力スキーマと出力スキーマ
プロンプトの入力スキーマと出力スキーマは、フロントマターのセクションで定義することで指定できます。
---
model: googleai/gemini-2.0-flash
input:
  schema:
    theme?: string
  default:
    theme: "pirate"
output:
  schema:
    dishname: string
    description: string
    calories: integer
    allergens(array): string
---
Invent a menu item for a {{theme}} themed restaurant.
これらのスキーマは、genkit.Generate() リクエストまたはフロー定義に渡されるスキーマとほぼ同じ方法で使用されます。たとえば、上記で定義したプロンプトでは、次の構造化出力が生成されます。
menuPrompt = genkit.LookupPrompt(g, "menu")
if menuPrompt == nil {
    log.Fatal("no prompt named 'menu' found")
}

resp, err := menuPrompt.Execute(context.Background(),
    ai.WithInput(map[string]any{"theme": "medieval"}),
)
if err != nil {
    log.Fatal(err)
}

var output map[string]any
if err := resp.Output(&output); err != nil {
    log.Fatal(err)
}

log.Println(output["dishname"])
log.Println(output["description"])
.prompt ファイルでスキーマを定義するには、Dotprompt 独自のスキーマ定義形式である Picoschema、標準の JSON スキーマ、またはアプリケーション コードで定義されたスキーマへの参照など、いくつかの方法があります。以降のセクションでは、これらのオプションについて詳しく説明します。
Picoschema
上記の例のスキーマは、Picoschema という形式で定義されています。Picoschema は、YAML 用に最適化されたコンパクトなスキーマ定義形式で、LLM の使用に必要なスキーマの最も重要な属性を簡単に定義できます。以下に、記事に関するアプリが保存する可能性のある情報を指定するスキーマの例を示します。
schema:
  title: string # string, number, and boolean types are defined like this
  subtitle?: string # optional fields are marked with a `?`
  draft?: boolean, true when in draft state
  status?(enum, approval status): [PENDING, APPROVED]
  date: string, the date of publication e.g. '2024-04-09' # descriptions follow a comma
  tags(array, relevant tags for article): string # arrays are denoted via parentheses
  authors(array):
    name: string
    email?: string
  metadata?(object): # objects are also denoted via parentheses
    updatedAt?: string, ISO timestamp of last update
    approvedBy?: integer, id of approver
  extra?: any, arbitrary extra data
  (*): string, wildcard field
上記のスキーマは、次の Go 型と同等です。
type Article struct {
    Title    string   `json:"title"`
    Subtitle string   `json:"subtitle,omitempty" jsonschema:"required=false"`
    Draft    bool     `json:"draft,omitempty"`  // True when in draft state
    Status   string   `json:"status,omitempty" jsonschema:"enum=PENDING,enum=APPROVED"` // Approval status
    Date     string   `json:"date"`   // The date of publication e.g. '2025-04-07'
    Tags     []string `json:"tags"`   // Relevant tags for article
    Authors  []struct {
      Name  string `json:"name"`
      Email string `json:"email,omitempty"`
    } `json:"authors"`
    Metadata struct {
      UpdatedAt  string `json:"updatedAt,omitempty"`  // ISO timestamp of last update
      ApprovedBy int    `json:"approvedBy,omitempty"` // ID of approver
    } `json:"metadata,omitempty"`
    Extra any `json:"extra"` // Arbitrary extra data
}
Picoschema は、スカラー型の string、integer、number、boolean、any をサポートしています。オブジェクト、配列、列挙型は、フィールド名の後に括弧で囲んで記述します。
Picoschema で定義されたオブジェクトは、? で省略可能と指定されていない限り、すべてのプロパティが必須であり、また追加のプロパティは許可されません。プロパティが省略可能としてマークされている場合、そのプロパティは null 値許容型にもなるため、LLM はフィールドを省略するかわりに null を返すことも可能になります。
オブジェクト定義では、特殊なキー (*) を使用して「ワイルドカード」フィールド定義を宣言できます。これには、明示的なキーで指定されていない任意の追加プロパティがマッチします。
JSON スキーマ
Picoschema は、フルセットの JSON スキーマが持つ多くの機能をサポートしていません。より堅牢なスキーマが必要な場合は、代わりに JSON スキーマで与えることができます。
output:
  schema:
    type: object
    properties:
      field1:
        type: number
        minimum: 20
プロンプト テンプレート
フロントマターに続く .prompt ファイルの一部(存在する場合)は、モデルに渡されるプロンプト自体で、その後モデルに渡されます。このプロンプトは、単純なテキスト文字列にすることもできますが、多くの場合、ユーザー入力をプロンプトに組み込む必要があります。これを行うには、Handlebars テンプレート言語を使用してプロンプトを指定します。プロンプト テンプレートには、プロンプトの入力スキーマで定義された値を参照するプレースホルダを含めることができます。
これは、入力スキーマと出力スキーマのセクションですでに確認しました。
---
model: googleai/gemini-2.0-flash
input:
  schema:
    theme?: string
  default:
    theme: "pirate"
output:
  schema:
    dishname: string
    description: string
    calories: integer
    allergens(array): string
---
Invent a menu item for a {{theme}} themed restaurant.
この例では、プロンプトを実行すると、Handlebars 式 {{theme}} が入力の theme プロパティの値に解決されます。入力をプロンプトに渡すには、次の例のようにプロンプトを呼び出します。
menuPrompt = genkit.LookupPrompt(g, "menu")

resp, err := menuPrompt.Execute(context.Background(),
    ai.WithInput(map[string]any{"theme": "medieval"}),
)
入力スキーマで theme プロパティが省略可能として宣言され、デフォルトが指定されているため、プロパティを省略しても、デフォルト値を使用してプロンプトが解決されます。
Handlebars テンプレートは、一部の制限付き論理構造もサポートしています。たとえば、デフォルトを指定する代わりに、Handlebars の #if ヘルパーを使用してプロンプトを定義できます。
---
model: googleai/gemini-2.0-flash
input:
  schema:
    theme?: string
---
Invent a menu item for a {{#if theme}}{{theme}}{else}themed{{/else}} restaurant.
この例では、theme プロパティが指定されていない場合、プロンプトは「レストランのメニュー項目を考案する」と表示されます。
組み込みの論理ヘルパーの詳細については、Handlebars のドキュメントをご覧ください。
テンプレートでは、入力スキーマで定義されたプロパティに加えて、Genkit によって自動的に定義された値を参照することもできます。以降のセクションでは、これらの自動定義の値とその使用方法について説明します。
複数メッセージのプロンプト
デフォルトでは、Dotprompt は「ユーザー」ロールで単一のメッセージを作成します。ただし、システム プロンプトなどのプロンプトは、複数のメッセージを組み合わせて表現するのが最善です。
{{role}} ヘルパーは、複数のメッセージのプロンプトを作成する簡単な方法を提供します。
---
model: vertexai/gemini-2.0-flash
input:
  schema:
    userQuestion: string
---
{{role "system"}}
You are a helpful AI assistant that really loves to talk about food. Try to work
food items into all of your conversations.

{{role "user"}}
{{userQuestion}}
マルチモーダル プロンプト
テキストと一緒に画像などのマルチモーダル入力をサポートするモデルでは、{{media}} ヘルパーを使用できます。
---
model: vertexai/gemini-2.0-flash
input:
  schema:
    photoUrl: string
---
Describe this image in a detailed paragraph:

{{media url=photoUrl}}
URL には、画像を「インライン」で使用するために、https: URI または base64 でエンコードされた data: URI を使用できます。コードでは次のようになります。
multimodalPrompt = genkit.LookupPrompt(g, "multimodal")

resp, err := multimodalPrompt.Execute(context.Background(),
    ai.WithInput(map[string]any{"photoUrl": "https://example.com/photo.jpg"}),
)
data: URL の作成例については、AI モデルによるコンテンツの生成のページのマルチモーダル入力もご覧ください。
パーシャル
パーシャルは、任意のプロンプト内に含めることができる再利用可能なテンプレートです。パーシャルは、共通の動作を共有する関連プロンプトの場合に特に便利です。
プロンプト ディレクトリを読み込むときに、接頭辞にアンダースコア(_)が付いているファイルはパーシャルと見なされます。たとえば、ファイル _personality.prompt には次の内容が含まれます。
You should speak like a {{#if style}}{{style}}{else}helpful assistant.{{/else}}.
これを他のプロンプトに含めることができます。
---
model: googleai/gemini-2.0-flash
input:
  schema:
    name: string
    style?: string
---
{{ role "system" }}
{{>personality style=style}}

{{ role "user" }}
Give the user a friendly greeting.

User's Name: {{name}}
パーシャルは {{>NAME_OF_PARTIAL args...}} 構文を使用して挿入されます。パーシャルに引数を指定しない場合は、親プロンプトと同じコンテキストで実行されます。
パーシャルは、上記の名前付き引数の両方、またはコンテキストを表す単一の位置引数の両方を受け入れます。これは、リストのメンバーのレンダリングなどのタスクに役立ちます。
_destination.prompt
- {{name}} ({{country}})
chooseDestination.prompt
---
model: googleai/gemini-2.0-flash
input:
  schema:
    destinations(array):
      name: string
      country: string
---
Help the user decide between these vacation destinations:

{{#each destinations}}
{{>destination this}}
{{/each}}
コードでパーシャルを定義する
genkit.DefinePartial() を使用して、コード内でパーシャルを定義することもできます。
genkit.DefinePartial(g, "personality", "Talk like a {{#if style}}{{style}}{{else}}helpful assistant{{/if}}.")
コードで定義されたパーシャルは、すべてのプロンプトで使用できます。
カスタム ヘルパーの定義
プロンプト内のデータを処理して管理するカスタム ヘルパーを定義できます。ヘルパーは genkit.DefineHelper() を使用してグローバルに登録されます。
genkit.DefineHelper(g, "shout", func(input string) string {
    return strings.ToUpper(input)
})
ヘルパーが定義されると、任意のプロンプトで使用できます。
---
model: googleai/gemini-2.0-flash
input:
  schema:
    name: string
---

HELLO, {{shout name}}!!!
プロンプトのバリアント
プロンプト ファイルはテキストにすぎないため、バージョン管理システムに commit できます(また、そうすべきです)。これにより、変更点を簡単に比較できます。 調整されたバージョンのプロンプトは、本番環境で既存のバージョンと同居させた状態でテストする以外に、完全にテストできる方法がない場合がよくあります。Dotprompt は、これを バリアント機能でサポートしています。
バリアントを作成するには、[name].[variant].prompt ファイルを作成します。たとえば、プロンプトで Gemini 2.0 Flash を使用していて、Gemini 2.5 Pro の方がパフォーマンスが高いかどうかを確認したい場合は、次の 2 つのファイルを作成します。
myPrompt.prompt: 「ベースライン」のプロンプトmyPrompt.gemini25pro.prompt:gemini25proという名前のバリアント
プロンプトのバリアントを使用するには、読み込み時にバリアントのオプションを指定します。
myPrompt := genkit.LookupPrompt(g, "myPrompt.gemini25Pro")
バリアント名は生成トレースのメタデータに含まれるため、Genkit トレース インスペクタを使い、バリアント間で実際のパフォーマンスを比較および対比できます。
コードでのプロンプトの定義
ここまで説明した例では、プロンプトが 1 つのディレクトリ(またはそのサブディレクトリ)内の個々の .prompt ファイルで定義され、アプリが実行時にアクセスできることを前提としていました。Dotprompt は、この設定を中心に設計されており、デベロッパーにとって全体的に最適なエクスペリエンスであると作者は考えています。
ただし、この設定で十分にサポートされていないユースケースがある場合は、genkit.DefinePrompt() 関数を使用してコードでプロンプトを定義することもできます。
type GeoQuery struct {
    CountryCount int `json:"countryCount"`
}

type CountryList struct {
    Countries []string `json:"countries"`
}

geographyPrompt, err := genkit.DefinePrompt(
    g, "GeographyPrompt",
    ai.WithSystem("You are a geography teacher. Respond only when the user asks about geography."),
    ai.WithPrompt("Give me the {{countryCount}} biggest countries in the world by inhabitants."),
    ai.WithConfig(&googlegenai.GeminiConfig{Temperature: 0.5}),
    ai.WithInputType(GeoQuery{CountryCount: 10}) // Defaults to 10.
    ai.WithOutputType(CountryList{}),
)
if err != nil {
    log.Fatal(err)
}

resp, err := geographyPrompt.Execute(context.Background(), ai.WithInput(GeoQuery{CountryCount: 15}))
if err != nil {
    log.Fatal(err)
}

var list CountryList
if err := resp.Output(&list); err != nil {
    log.Fatal(err)
}

log.Println("Countries: %s", list.Countries)
プロンプトを GenerateActionOptions にレンダリングし、処理して genkit.GenerateWithRequest() に渡すこともできます。
actionOpts, err := geographyPrompt.Render(ctx, ai.WithInput(GeoQuery{CountryCount: 15}))
if err != nil {
    log.Fatal(err)
}

// Do something with the value...
actionOpts.Config = &googlegenai.GeminiConfig{Temperature: 0.8}

resp, err := genkit.GenerateWithRequest(ctx, g, actionOpts, nil, nil) // No middleware or streaming
WithMiddleware() を除くすべてのプロンプト オプションは GenerateActionOptions に引き継がれます。これは、Prompt.Execute() ではなく Prompt.Render() を使用する場合は個別に渡す必要があります。