
提示工程是應用程式開發人員影響生成式 AI 模型輸出內容的主要方式。舉例來說,使用 LLM 時,您可以設計提示,影響模型回應的語氣、格式、長度和其他特徵。
您撰寫這些提示的方式取決於所使用的模型;為某個模型撰寫的提示,在用於其他模型時可能成效不彰。同樣地,您設定的模型參數 (溫度、前 K 個等) 也會根據模型而對輸出結果產生不同的影響。
要讓這三個因素 (模型、模型參數和提示) 共同產生您想要的輸出內容,通常需要大量的疊代和實驗。Genkit 提供名為 Dotprompt 的程式庫和檔案格式,旨在讓這個疊代作業更快速、更方便。
Dotprompt 的設計理念是「提示是程式碼」。您可以將提示與模型和模型參數一起定義,但這些項目應與應用程式程式碼分開。接著,您 (或許是未參與編寫應用程式程式碼的人員) 可以使用 Genkit 開發人員 UI 快速重複執行提示和模型參數。提示功能運作正常後,您可以將其匯入應用程式,並使用 Genkit 執行。
提示定義會分別放在副檔名為 .prompt 的檔案中。以下是這些檔案的範例:
---
model: googleai/gemini-1.5-flash
config:
  temperature: 0.9
input:
  schema:
    location: string
    style?: string
    name?: string
  default:
    location: a restaurant
---

You are the world's most welcoming AI assistant and are currently working at {{location}}.

Greet a guest{{#if name}} named {{name}}{{/if}}{{#if style}} in the style of {{style}}{{/if}}.
三條線段中的部分內容是 YAML 前言,類似於 GitHub Markdown 和 Jekyll 使用的前言格式;檔案的其餘部分是提示,可選擇使用 Handlebars 範本。以下各節將進一步說明組成 .prompt 檔案的各個部分,以及如何使用這些部分。
事前準備
閱讀本頁之前,請先熟悉「使用 AI 模型產生內容」頁面所涵蓋的內容。
如果您想執行本頁的程式碼範例,請先完成「開始使用」指南中的步驟。所有範例都假設您已在專案中安裝 Genkit 做為依附元件。
建立提示檔案
雖然 Dotprompt 提供多種不同的方式建立及載入提示,但專案的提示必須以 .prompt 檔案的形式,在單一目錄 (或其子目錄) 中進行整理,才能發揮最佳化效果。本節將說明如何使用此建議設定建立及載入提示。
建立提示目錄
Dotprompt 程式庫會在專案根目錄的目錄中尋找提示,並自動載入找到的任何提示。根據預設,這個目錄的名稱為 prompts。舉例來說,如果使用預設的目錄名稱,專案結構可能會像這樣:
your-project/
├── prompts/
│   └── hello.prompt
├── main.go
├── go.mod
└── go.sum
如果您想使用其他目錄,可以在設定 Genkit 時指定:
g, err := genkit.Init(ctx.Background(), ai.WithPromptDir("./llm_prompts"))
建立提示檔案
您可以透過兩種方式建立 .prompt 檔案:使用文字編輯器或開發人員 UI。
使用文字編輯器
如果您想使用文字編輯器建立提示檔案,請在提示目錄中建立使用 .prompt 副檔名的文字檔,例如 prompts/hello.prompt。
以下是提示檔案的簡易範例:
---
model: vertexai/gemini-1.5-flash
---
You are the world's most welcoming AI assistant. Greet the user and offer your
assistance.
虛線內的部分是 YAML 前言,類似 GitHub Markdown 和 Jekyll 使用的前言格式;檔案的其餘部分是提示,可選擇使用 Handlebars 範本。前言部分為選用項目,但大多數提示檔案至少會包含指定模型的中繼資料。本頁面的其餘部分會說明如何進一步使用 Dotprompt 功能,並在提示檔案中使用 Dotprompt 功能。
使用開發人員 UI
您也可以在開發人員 UI 中使用模型執行工具建立提示檔案。請先從應用程式程式碼開始,匯入 Genkit 程式庫,並將其設為使用您感興趣的模型外掛程式。例如:
import (
    "context"

    "github.com/firebase/genkit/go/ai"
    "github.com/firebase/genkit/go/genkit"
    "github.com/firebase/genkit/go/plugins/googlegenai"
)

func main() {
    g, err := genkit.Init(context.Background(), ai.WithPlugins(&googlegenai.GoogleAI{}))
    if err != nil {
        log.Fatal(err)
    }

    // Blocks end of program execution to use the developer UI.
    select {}
}
在同一個專案中載入開發人員 UI:
genkit start -- go run .在「Model」部分,從外掛程式提供的模型清單中選擇要使用的模型。
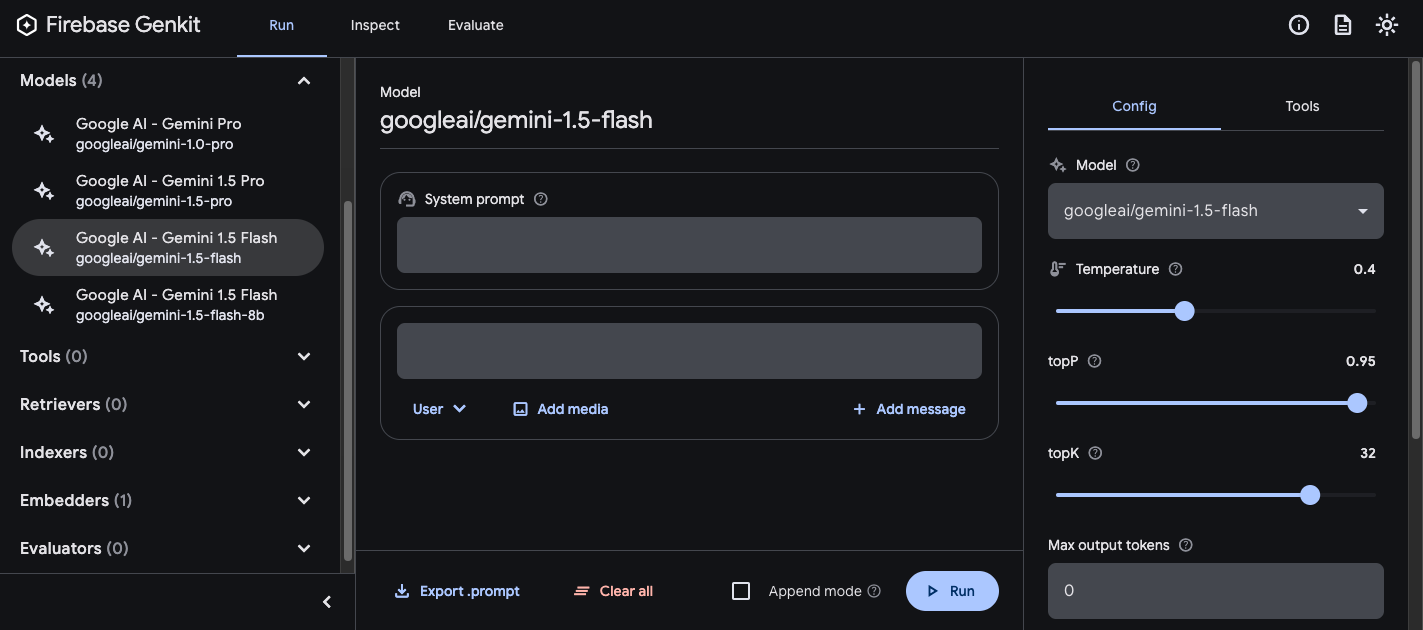
接著,請嘗試使用提示和設定,直到獲得滿意的結果。準備就緒後,請按下「Export」按鈕,並將檔案儲存至提示目錄。
執行提示
建立提示檔案後,您可以透過應用程式程式碼或 Genkit 提供的工具執行這些檔案。無論您要如何執行提示,請先從應用程式程式碼開始,匯入 Genkit 程式庫和您感興趣的模型外掛程式。例如:
import (
    "context"

      "github.com/firebase/genkit/go/ai"
    "github.com/firebase/genkit/go/genkit"
    "github.com/firebase/genkit/go/plugins/googlegenai"
)

func main() {
    g, err := genkit.Init(context.Background(), ai.WithPlugins(&googlegenai.GoogleAI{}))
    if err != nil {
        log.Fatal(err)
    }

    // Blocks end of program execution to use the developer UI.
    select {}
}
如果您將提示儲存在預設目錄以外的目錄中,請務必在設定 Genkit 時指定該目錄。
透過程式碼執行提示
如要使用提示,請先使用 genkit.LookupPrompt() 函式載入提示:
helloPrompt := genkit.LookupPrompt(g, "hello")
可執行提示的選項與 genkit.Generate() 的選項類似,而且許多選項可以在執行時覆寫,包括輸入內容 (請參閱「指定輸入模式架構」一節)、設定等等:
resp, err := helloPrompt.Execute(context.Background(),
    ai.WithModelName("googleai/gemini-2.0-flash"),
    ai.WithInput(map[string]any{"name": "John"}),
    ai.WithConfig(&googlegenai.GeminiConfig{Temperature: 0.5})
)
您傳遞至提示呼叫的任何參數,都會覆寫提示檔案中指定的相同參數。
如要瞭解可用的選項,請參閱「使用 AI 模型產生內容」。
使用開發人員 UI
在精進應用程式提示時,您可以在 Genkit 開發人員 UI 中執行提示,快速重複提示和模型設定,不受應用程式程式碼影響。
從專案目錄載入開發人員 UI:
genkit start -- go run .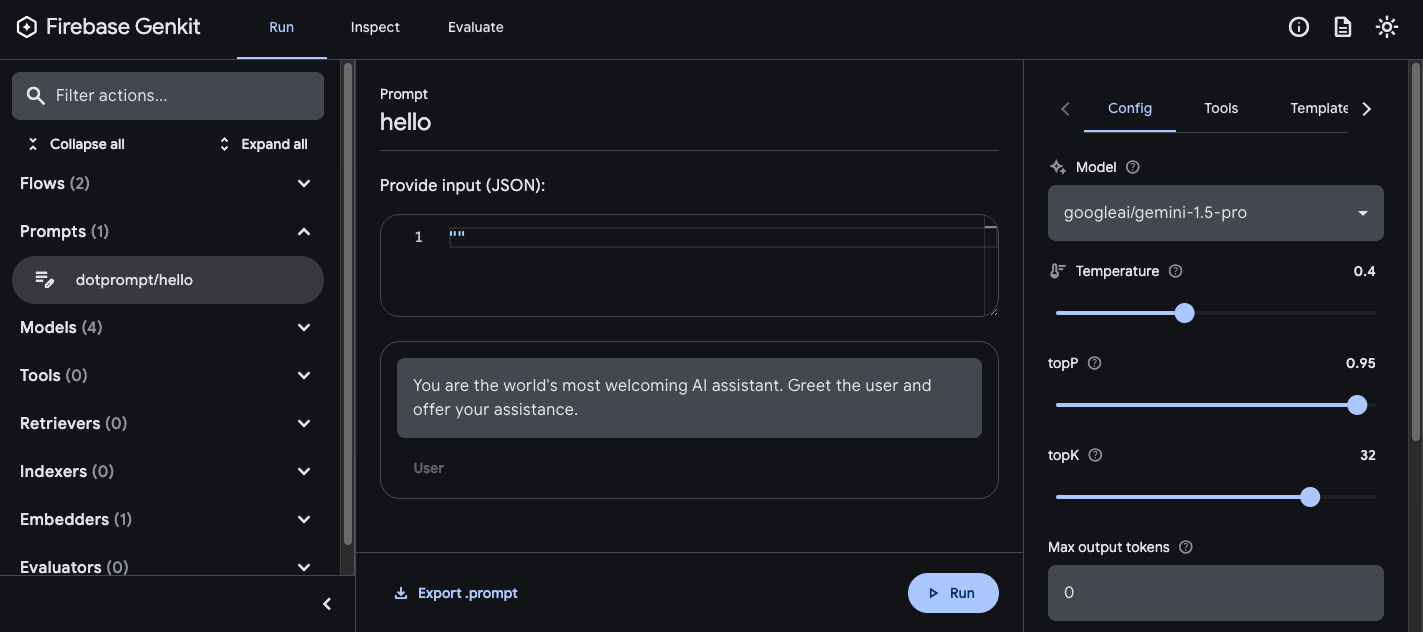
將提示載入至開發人員 UI 後,您可以使用不同的輸入值執行提示,並嘗試變更提示用語或設定參數,瞭解對模型輸出內容的影響。滿意結果後,您可以按一下「匯出提示」按鈕,將修改過的提示儲存回專案目錄。
模型設定
您可以在提示檔案的前置區塊中,選擇性地為提示指定模型設定值:
---
model: googleai/gemini-2.0-flash
config:
  temperature: 1.4
  topK: 50
  topP: 0.4
  maxOutputTokens: 400
  stopSequences:
    -   "<end>"
    -   "<fin>"
---
這些值會直接對應至可執行提示接受的 WithConfig() 選項:
resp, err := helloPrompt.Execute(context.Background(),
    ai.WithConfig(&googlegenai.GeminiConfig{
        Temperature:     1.4,
        TopK:            50,
        TopP:            0.4,
        MaxOutputTokens: 400,
        StopSequences:   []string{"<end>", "<fin>"},
    }))
如要瞭解可用的選項,請參閱「使用 AI 模型產生內容」。
輸入和輸出結構定義
您可以在前言部分定義提示的輸入和輸出結構定義。這些結構定義的使用方式與傳遞至 genkit.Generate() 要求或流程定義的結構定義非常相似:
---
model: googleai/gemini-2.0-flash
input:
  schema:
    theme?: string
  default:
    theme: "pirate"
output:
  schema:
    dishname: string
    description: string
    calories: integer
    allergens(array): string
---
Invent a menu item for a {{theme}} themed
restaurant.
這個程式碼會產生下列結構化輸出內容:
menuPrompt = genkit.LookupPrompt(g, "menu")
if menuPrompt == nil {
    log.Fatal("no prompt named 'menu' found")
}

resp, err := menuPrompt.Execute(context.Background(),
    ai.WithInput(map[string]any{"theme": "medieval"}),
)
if err != nil {
    log.Fatal(err)
}

var output map[string]any
if err := resp.Output(&output); err != nil {
    log.Fatal(err)
}

log.Println(output["dishname"])
log.Println(output["description"])
您可以在 .prompt 檔案中定義結構定義,方法有以下幾種:Dotprompt 專屬的結構定義格式 Picoschema;標準 JSON 結構定義;或應用程式程式碼中定義的結構定義參照。以下各節將詳細說明這些選項。
Picoschema
上例中的結構定義是以 Picoschema 格式定義。Picoschema 是一種簡潔的 YAML 最佳化結構定義格式,可簡化 LLM 使用情況下結構最重要的屬性定義。以下是較長的架構範例,其中指定應用程式可能儲存的文章相關資訊:
schema:
  title: string # string, number, and boolean types are defined like this
  subtitle?: string # optional fields are marked with a `?`
  draft?: boolean, true when in draft state
  status?(enum, approval status): [PENDING, APPROVED]
  date: string, the date of publication e.g. '2024-04-09' # descriptions follow a comma
  tags(array, relevant tags for article): string # arrays are denoted via parentheses
  authors(array):
    name: string
    email?: string
  metadata?(object): # objects are also denoted via parentheses
    updatedAt?: string, ISO timestamp of last update
    approvedBy?: integer, id of approver
  extra?: any, arbitrary extra data
  (*): string, wildcard field
上述結構定義等同於下列 Go 型別:
type Article struct {
    Title    string   `json:"title"`
    Subtitle string   `json:"subtitle,omitempty" jsonschema:"required=false"`
    Draft    bool     `json:"draft,omitempty"`  // True when in draft state
    Status   string   `json:"status,omitempty" jsonschema:"enum=PENDING,enum=APPROVED"` // Approval status
    Date     string   `json:"date"`   // The date of publication e.g. '2025-04-07'
    Tags     []string `json:"tags"`   // Relevant tags for article
    Authors  []struct {
      Name  string `json:"name"`
      Email string `json:"email,omitempty"`
    } `json:"authors"`
    Metadata struct {
      UpdatedAt  string `json:"updatedAt,omitempty"`  // ISO timestamp of last update
      ApprovedBy int    `json:"approvedBy,omitempty"` // ID of approver
    } `json:"metadata,omitempty"`
    Extra any `json:"extra"` // Arbitrary extra data
}
Picoschema 支援純量型別 string、integer、number、boolean 和 any。物件、陣列和列舉會以欄位名稱後方的括號表示。
除非使用 ? 表示屬性為選用屬性,否則 Picoschema 定義的物件都會要求所有屬性,且不允許額外屬性。當屬性標示為選用時,也會設為可為空值,讓 LLM 更寬鬆地返回空值,而非省略欄位。
在物件定義中,您可以使用特殊鍵 (*) 宣告「萬用字」欄位定義。這會比對任何未由明確鍵提供的額外屬性。
JSON 結構定義
Picoschema 不支援完整 JSON 結構定義的許多功能。如果您需要更強大的結構定義,可以改為提供 JSON 結構定義:
output:
  schema:
    type: object
    properties:
      field1:
        type: number
        minimum: 20
提示範本
.prompt 檔案中接續前言 (如有) 的部分就是提示本身,會傳遞至模型。雖然這個提示可以是簡單的文字字串,但您通常會將使用者輸入內容納入提示中。如要這麼做,您可以使用 Handlebars 模板語言指定提示。提示範本可包含預留位置,以便參照提示輸入結構定義的值。
您在輸入和輸出結構定義的部分已看到這項功能的實際運作情形:
---
model: googleai/gemini-2.0-flash
input:
  schema:
    theme?: string
  default:
    theme: "pirate"
output:
  schema:
    dishname: string
    description: string
    calories: integer
    allergens(array): string
---
Invent a menu item for a {{theme}} themed restaurant.
在這個範例中,當您執行提示時,Handlebars 運算式 {{theme}} 會解析為輸入內容的 theme 屬性值。如要將輸入內容傳遞至提示,請呼叫提示,如以下範例所示:
menuPrompt = genkit.LookupPrompt(g, "menu")

resp, err := menuPrompt.Execute(context.Background(),
    ai.WithInput(map[string]any{"theme": "medieval"}),
)
請注意,由於輸入結構定義宣告 theme 屬性為選用屬性並提供預設值,因此您可以省略該屬性,系統會使用預設值解決提示。
Handlebars 範本也支援一些有限的邏輯結構。舉例來說,您可以使用 Handlebars 的 #if 輔助程式定義提示,而非提供預設值:
---
model: googleai/gemini-2.0-flash
input:
  schema:
    theme?: string
---
Invent a menu item for a {{#if theme}}{{theme}}{else}themed{{/else}} restaurant.
在這個範例中,當未指定 theme 屬性時,提示會顯示為「Invent a menu item for a restaurant」。
如需所有內建邏輯輔助函式的相關資訊,請參閱 Handlebars 說明文件。
除了輸入結構定義定義的屬性外,範本也可以參照 Genkit 自動定義的值。接下來幾節將說明這些自動定義的值,以及如何使用這些值。
多則訊息提示
根據預設,Dotprompt 會建構具有「user」角色的單一訊息。不過,某些提示 (例如系統提示) 最好以多個訊息組合來表達。
{{role}} 輔助程式提供簡單的方法,可建構多訊息提示:
---
model: vertexai/gemini-2.0-flash
input:
  schema:
    userQuestion: string
---
{{role "system"}}
You are a helpful AI assistant that really loves to talk about food. Try to work
food items into all of your conversations.

{{role "user"}}
{{userQuestion}}
多模態提示
如果模型支援多模態輸入 (例如圖片和文字),您可以使用 {{media}} 輔助程式:
---
model: vertexai/gemini-2.0-flash
input:
  schema:
    photoUrl: string
---
Describe this image in a detailed paragraph:

{{media url=photoUrl}}
網址可以是 https: 或 base64 編碼的 data: URI,用於「內嵌」圖片。在程式碼中,這會是:
multimodalPrompt = genkit.LookupPrompt(g, "multimodal")

resp, err := multimodalPrompt.Execute(context.Background(),
    ai.WithInput(map[string]any{"photoUrl": "https://example.com/photo.jpg"}),
)
如要瞭解如何建構 data: 網址,請參閱「使用 AI 模型產生內容」頁面中的「多模態輸入」一節。
部分
區塊是可重複使用的範本,可納入任何提示中。對於共用常見行為的相關提示,部分內容特別實用。
載入提示目錄時,任何前置字串為底線 (_) 的檔案都會視為部分檔案。因此,檔案 _personality.prompt 可能包含:
You should speak like a {{#if style}}{{style}}{else}helpful assistant.{{/else}}.
您可以將這項資訊加入其他提示:
---
model: googleai/gemini-2.0-flash
input:
  schema:
    name: string
    style?: string
---
{{ role "system" }}
{{>personality style=style}}

{{ role "user" }}
Give the user a friendly greeting.

User's Name: {{name}}
插入的部分會使用 {{>NAME_OF_PARTIAL args...}} 語法。如果未向部分提供引數,則會以與父項提示相同的內容執行。
部分會接受具名引數或代表情境的單一位置引數。這對於轉譯清單成員等工作相當實用。
_destination.prompt
- {{name}} ({{country}})
chooseDestination.prompt
---
model: googleai/gemini-2.0-flash
input:
  schema:
    destinations(array):
      name: string
      country: string
---
Help the user decide between these vacation destinations:

{{#each destinations}}
{{>destination this}}
{{/each}}
在程式碼中定義分頁
您也可以使用 genkit.DefinePartial() 在程式碼中定義部分:
genkit.DefinePartial(g, "personality", "Talk like a {{#if style}}{{style}}{{else}}helpful assistant{{/if}}.")
程式碼定義的部分檔案可用於所有提示。
定義自訂輔助程式
您可以定義自訂輔助程式,用於處理提示中的資料並加以管理。輔助程式會使用 genkit.DefineHelper() 在全球註冊:
genkit.DefineHelper(g, "shout", func(input string) string {
    return strings.ToUpper(input)
})
定義輔助程式後,您可以在任何提示中使用它:
---
model: googleai/gemini-2.0-flash
input:
  schema:
    name: string
---

HELLO, {{shout name}}!!!
提示變化版本
由於提示檔案只是文字,因此您可以 (而且應該!) 將這些檔案提交至版本控制系統,簡化比較變更的程序。經過調整的提示版本通常只能在實際工作環境中與現有版本並列,才能進行完整測試。Dotprompt 透過其變數功能支援這項功能。
如要建立變化版本,請建立 [name].[variant].prompt 檔案。舉例來說,如果您在提示中使用 Gemini 2.0 Flash,但想瞭解 Gemini 2.5 Pro 的效能是否更好,可以建立兩個檔案:
myPrompt.prompt:「baseline」提示myPrompt.gemini25pro.prompt:名為gemini25pro的變化版本
如要使用提示變化版本,請在載入時指定變化版本選項:
myPrompt := genkit.LookupPrompt(g, "myPrompt.gemini25Pro")
變化版本的名稱會包含在代碼追蹤的中繼資料中,因此您可以在 Genkit 追蹤檢查器中比較變化版本的實際成效。
在程式碼中定義提示
到目前為止,我們討論的所有範例都假設提示是在單一目錄 (或其子目錄) 中的個別 .prompt 檔案中定義,且應用程式可在執行階段存取這些檔案。Dotprompt 是依據這種設定設計,作者認為這是整體最佳的開發人員體驗。
不過,如果您有用途不受此設定支援,也可以使用 genkit.DefinePrompt() 函式在程式碼中定義提示:
type GeoQuery struct {
    CountryCount int `json:"countryCount"`
}

type CountryList struct {
    Countries []string `json:"countries"`
}

geographyPrompt, err := genkit.DefinePrompt(
    g, "GeographyPrompt",
    ai.WithSystem("You are a geography teacher. Respond only when the user asks about geography."),
    ai.WithPrompt("Give me the {{countryCount}} biggest countries in the world by inhabitants."),
    ai.WithConfig(&googlegenai.GeminiConfig{Temperature: 0.5}),
    ai.WithInputType(GeoQuery{CountryCount: 10}) // Defaults to 10.
    ai.WithOutputType(CountryList{}),
)
if err != nil {
    log.Fatal(err)
}

resp, err := geographyPrompt.Execute(context.Background(), ai.WithInput(GeoQuery{CountryCount: 15}))
if err != nil {
    log.Fatal(err)
}

var list CountryList
if err := resp.Output(&list); err != nil {
    log.Fatal(err)
}

log.Println("Countries: %s", list.Countries)
提示也可以轉譯為 GenerateActionOptions,然後再進行處理並傳遞至 genkit.GenerateWithRequest():
actionOpts, err := geographyPrompt.Render(ctx, ai.WithInput(GeoQuery{CountryCount: 15}))
if err != nil {
    log.Fatal(err)
}

// Do something with the value...
actionOpts.Config = &googlegenai.GeminiConfig{Temperature: 0.8}

resp, err := genkit.GenerateWithRequest(ctx, g, actionOpts, nil, nil) // No middleware or streaming
請注意,除了 WithMiddleware() 以外,所有提示選項都會傳遞至 GenerateActionOptions。如果使用 Prompt.Render() 而非 Prompt.Execute(),則必須個別傳遞 WithMiddleware()。