
This quickstart gets you up and running with Firebase Data Connect to connect your web and mobile apps to a PostgreSQL database. You will:
- Set up your local Firebase Data Connect project directory with VS Code and the Firebase CLI.
- Generate Data Connect schemas, queries and mutations based on your app ideas in natural language.
- Use the strongly-typed SDKs in your apps to run Data Connect queries and mutations.
- Provision a Cloud SQL for PostgreSQL instance, a Data Connect schema, queries, and mutations (requires a Blaze plan).
Set up the local project directory
You can install local development tools for Data Connect in two ways.
Install the following prerequisites:
Node.js, using nvm-windows for Windows or nvm for macOS or Linux.
The Firebase CLI
Create a project directory and open it in Visual Studio Code.
Install the Firebase Data Connect extension from the VS Code Marketplace.
Click the Sign in with Google button.
Click the Connect a Firebase project button.
Click the Run firebase init button.
Click the Start emulators button to run the Data Connect emulator with a local PGlite database.
Review schema
Firebase Data Connect uses GraphQL to define your data model. The
@table directive maps a
GraphQL type to a PostgreSQL table. Fields in the type map to PostgreSQL
columns. You can define relationships between tables using fields that reference
other @table types, including many-to-many relationships using join tables
with composite primary keys.
In the default setup, you can find the Data Connect schema files in
the dataconnect/schema/ directory. Here are two example tables from the movie
template schema. Your schema may be different if you used Gemini to generate it.
type Movie @table {
  # Every table has an implicit primary key field that looks something like:
  #  id: UUID! @default(expr: "uuidV4()")
  title: String!
  imageUrl: String!
  genre: String
}

type Review @table(key: ["movie", "user"]) {
  user: User!
  movie: Movie!
  rating: Int
  reviewText: String
  reviewDate: Date! @default(expr: "request.time")
}
Learn more about Data Connect schemas
Develop queries and mutations
Firebase Data Connect uses GraphQL for queries and mutations. You define
these in .gql files and call them by name from your app. GraphQL syntax
provides strongly-typed SDKs and a flexible API to fetch the exact data your app
needs.
Seed data in your database
With the emulator running, you can seed it with initial data. You can use the
provided dataconnect/seed_data.gql file or write your own mutations.
Use the Run (local) Code Lens button in VS Code to execute the mutations and populate your local PGlite database.
Review queries and mutations
In the default setup, you can find the Data Connect queries and mutations in
dataconnect/example/ directory.
You can query relational data precisely with nested queries.
query ListMovies @auth(level: PUBLIC, insecureReason: "Anyone can list all movies and their reviews.") {
  movies {
    title imageUrl genre
    reviews_on_movie {
      rating reviewDate
      user { username }
    }
  }
}
Data Connect helps you build secure queries and mutations with Firebase Auth.
To keep your app secure, web and mobile apps can only access
Data Connect queries and mutations with
@auth
directives. Queries and mutations can securely access the Firebase Auth UID
using an expression like {field}_expr: "auth.uid".
mutation AddReview($movieId: UUID!, $rating: Int!, $reviewText: String!) @auth(level: USER) {
  review_upsert(
    data: {
      userId_expr: "auth.uid"
      movieId: $movieId
      rating: $rating
      reviewText: $reviewText
    }
  )
}
Learn more about Data Connect queries Learn more about Data Connect mutations Learn more about Data Connect Auth
Generate queries and mutations
You don't need to be a GraphQL expert to use Data Connect effectively. You can generate Data Connect queries and mutations from natural language descriptions.
In any .gql file, type # to start a comment and describe a query or
mutation. Then, use the Generate/Refine Operation Code Lens button to
generate the GraphQL operation.

Use generated SDK in your app
firebase init dataconnect automatically sets up type-safe SDKs for apps in
your project. If needed, you can add the SDK manually with the Add SDK to
app button in the VS Code extension or by running firebase init
dataconnect:sdk.
Web
- Add Firebase to your web app.
In your React app's main file:
- Import your generated SDK:
// Update as needed with the path to your generated SDK. import { listMovies, ListMoviesData } from '@dataconnect/generated';- Instrument your app to connect to the Data Connect emulator:
import { connectDataConnectEmulator } from 'firebase/data-connect'; const dataConnect = getDataConnect(connectorConfig); connectDataConnectEmulator(dataConnect, 'localhost', 9399);- Call Data Connect methods.
function App() {
  const [movies, setMovies] = useState<ListMoviesData['movies']>([]);
  useEffect(() => {
    listMovies.then(res => setMovies(res.data));
  }, []);
  return (
    movies.map(movie => <h1>{movie.title}</h1>);
  );
}

const root = ReactDOM.createRoot(document.getElementById('root'));
root.render(<App />);
Swift
- Add Firebase to your iOS app.
To use the generated SDK, configure it as a dependency in Xcode.
In the Xcode top navigation bar, select File > Add Package Dependencies > Add Local, and choose the folder containing the generated
Package.swift.In your app's main delegate:
Import the Data Connect SDK and your generated SDK:
import FirebaseDataConnect
// Generated queries.
// Update as needed with the package name of your generated SDK.
import <CONNECTOR-PACKAGE-NAME>

let connector = DataConnect.moviesConnector
Instrument your app to connect to the Data Connect emulator:
// Connect to the emulator on "127.0.0.1:9399"
connector.useEmulator()

// (alternatively) if you're running your emulator on non-default port:
// connector.useEmulator(port: 9999)
Call Data Connect methods:
struct ListMovieView: View {
    @StateObject private var queryRef = connector.listMovies.ref()

    var body: some View {
        VStack {
            Button {
                Task {
                    do {
                        try await refresh()
                    } catch {
                        print("Failed to refresh: \(error)")
                    }
                }
            } label: {
                Text("Refresh")
            }

            // use the query results in a view
            ForEach(queryRef.data?.movies ?? []) { movie in
                Text(movie.title)
            }

        }
    }
}

@MainActor
func refresh() async throws {
    _ = try await queryRef.execute()
}

struct ContentView_Previews: PreviewProvider {
    static var previews: some View {
        ListMovieView()
    }
}
Kotlin Android
- Add Firebase to your Android app.
To use the generated SDK, configure Data Connect as a dependency in Gradle.
Update
pluginsanddependenciesin yourapp/build.gradle.kts.plugins { // Use whichever versions of these dependencies suit your application. // The versions shown here were the latest as of March 14, 2025. // Note, however, that the version of kotlin("plugin.serialization") must, // in general, match the version of kotlin("android"). id("com.android.application") version "8.9.0" id("com.google.gms.google-services") version "4.4.2" val kotlinVersion = "2.1.10" kotlin("android") version kotlinVersion kotlin("plugin.serialization") version kotlinVersion } dependencies { // Use whichever versions of these dependencies suit your application. // The versions shown here were the latest versions as of March 14, 2025. implementation("com.google.firebase:firebase-dataconnect:16.0.0-beta04") implementation("org.jetbrains.kotlinx:kotlinx-coroutines-core:1.10.1") implementation("org.jetbrains.kotlinx:kotlinx-serialization-core:1.7.3") // These dependencies are not strictly required, but will very likely be used // when writing modern Android applications. implementation("org.jetbrains.kotlinx:kotlinx-coroutines-android:1.9.0") implementation("androidx.appcompat:appcompat:1.7.0") implementation("androidx.activity:activity-ktx:1.10.1") implementation("androidx.lifecycle:lifecycle-viewmodel-ktx:2.8.7") implementation("com.google.android.material:material:1.12.0") }In your app's main activity:
- Get a connector instance from your generated SDK:
private val connector = com.myapplication.MoviesConnector.instance- Instrument your app to connect to the Data Connect emulator:
private val connector = com.myapplication.MoviesConnector.instance .apply { // Connect to the emulator on "10.0.2.2:9399" (default port) dataConnect.useEmulator() // (alternatively) if you're running your emulator on non-default port: // dataConnect.useEmulator(port = 9999) }- Call Data Connect methods.
class MainActivity : AppCompatActivity() {

  override fun onCreate(savedInstanceState: Bundle?) {
    super.onCreate(savedInstanceState)
    setContentView(R.layout.activity_main)
    val textView: TextView = findViewById(R.id.text_view)

    lifecycleScope.launch {
      lifecycle.repeatOnLifecycle(Lifecycle.State.STARTED) {

        val result = connector.listMovies.runCatching { execute { } }

        val newTextViewText = result.fold(
          onSuccess = {
            val titles = it.data.movies.map { it.title }
            "${titles.size} movies: " + titles.joinToString(", ")
          },
          onFailure = { "ERROR: ${it.message}" }
        )
        textView.text = newTextViewText
      }
    }
  }
}
Flutter
- Add Firebase to your Flutter app.
- Install the flutterfire CLI
dart pub global activate flutterfire_cli. - Run
flutterfire configure. In your app's main function:
- Import your generated SDK:
// Generated queries. // Update as needed with the path to your generated SDK import 'movies_connector/movies.dart';- Instrument your app to connect to the Data Connect emulator:
void main() async { WidgetsFlutterBinding.ensureInitialized(); await Firebase.initializeApp( options: DefaultFirebaseOptions.currentPlatform, ); MoviesConnector.instance.dataConnect .useDataConnectEmulator(Uri.base.host, 443, isSecure: true); runApp(const MyApp()); }- Call Data Connect methods.
class MyApp extends StatelessWidget {
  const MyApp({super.key});
  @override
  Widget build(BuildContext context) {
    return MaterialApp(
        home: Scaffold(
            body: Column(children: [
      ConstrainedBox(
        constraints: const BoxConstraints(maxHeight: 200),
        child: FutureBuilder(
            future: MoviesConnector.instance.listMovies().execute(),
            builder: (context, snapshot) {
              if (snapshot.connectionState == ConnectionState.done) {
                return ListView.builder(
                  scrollDirection: Axis.vertical,
                  itemBuilder: (context, index) => Card(
                      child: Text(
                    snapshot.data!.data.movies[index].title,
                  )),
                  itemCount: snapshot.data!.data.movies.length,
                );
              }
              return const CircularProgressIndicator();
            }),
      )
    ])));
  }
}
Deploy to production
To deploy your schema, queries and mutations to production:
Upgrade the Firebase Project to use the Blaze plan.
Click the Deploy to production button in Data Connect VS Code extension or run in a terminal:
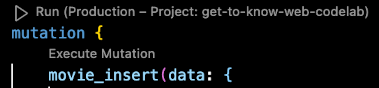
firebase deploy --only dataconnectAfter deploying, visit the Firebase console to view your schema and run queries and mutations.
Learn more about dataconnect.yaml Learn more about how Data Connect works with Cloud SQL
Next steps
Now that you've completed the quickstart, here are some next steps:
- Explore a quickstart app repository and build a fully-featured Data Connect app by following our codelab for web, codelab for iOS, or codelab for Android.
- Add data to your database, inspect your schemas, and monitor your Data Connect service in the Firebase console.
- Set up the Firebase MCP server with AI-powered development tools like Gemini Code Assist.
- Learn more about schema, query and mutation development.
- Learn more about how Data Connect manages PostgreSQL schema.
- Learn more about client SDKs for web, Android, iOS, and Flutter as well as Admin SDKs for Node.js.