
With an existing Next.js or Angular app (Next.js versions 13.5.x+ or Angular 18.2.x+) in a GitHub repository, getting started with App Hosting can be as straightforward as creating an App Hosting backend and then starting a rollout with a push to your live branch. If you don't have an app, use one of our sample apps to walk through the steps described in this guide.
This guide describes how to set up App Hosting in the Firebase console to
automatically deploy every time a new commit is made to a GitHub repository. At
the end of this flow you'll have a live Next.js or Angular example app that is
redeployed every time you commit a new change to your GitHub repository's
main branch.
Though this guide focuses on the recommended Firebase console flow, there are other ways to deploy, including using the Firebase CLI to deploy local code without a GitHub connection.
Step 1: Fork the demo repository
Visit https://github.com/firebase/apphosting-adapters and select Fork.
Step 2: Create an App Hosting backend
In the Firebase console, navigate to Hosting & Serverless > App Hosting.
Click Get started.
If prompted, upgrade to the pay-as-you-go Blaze pricing plan to use App Hosting.
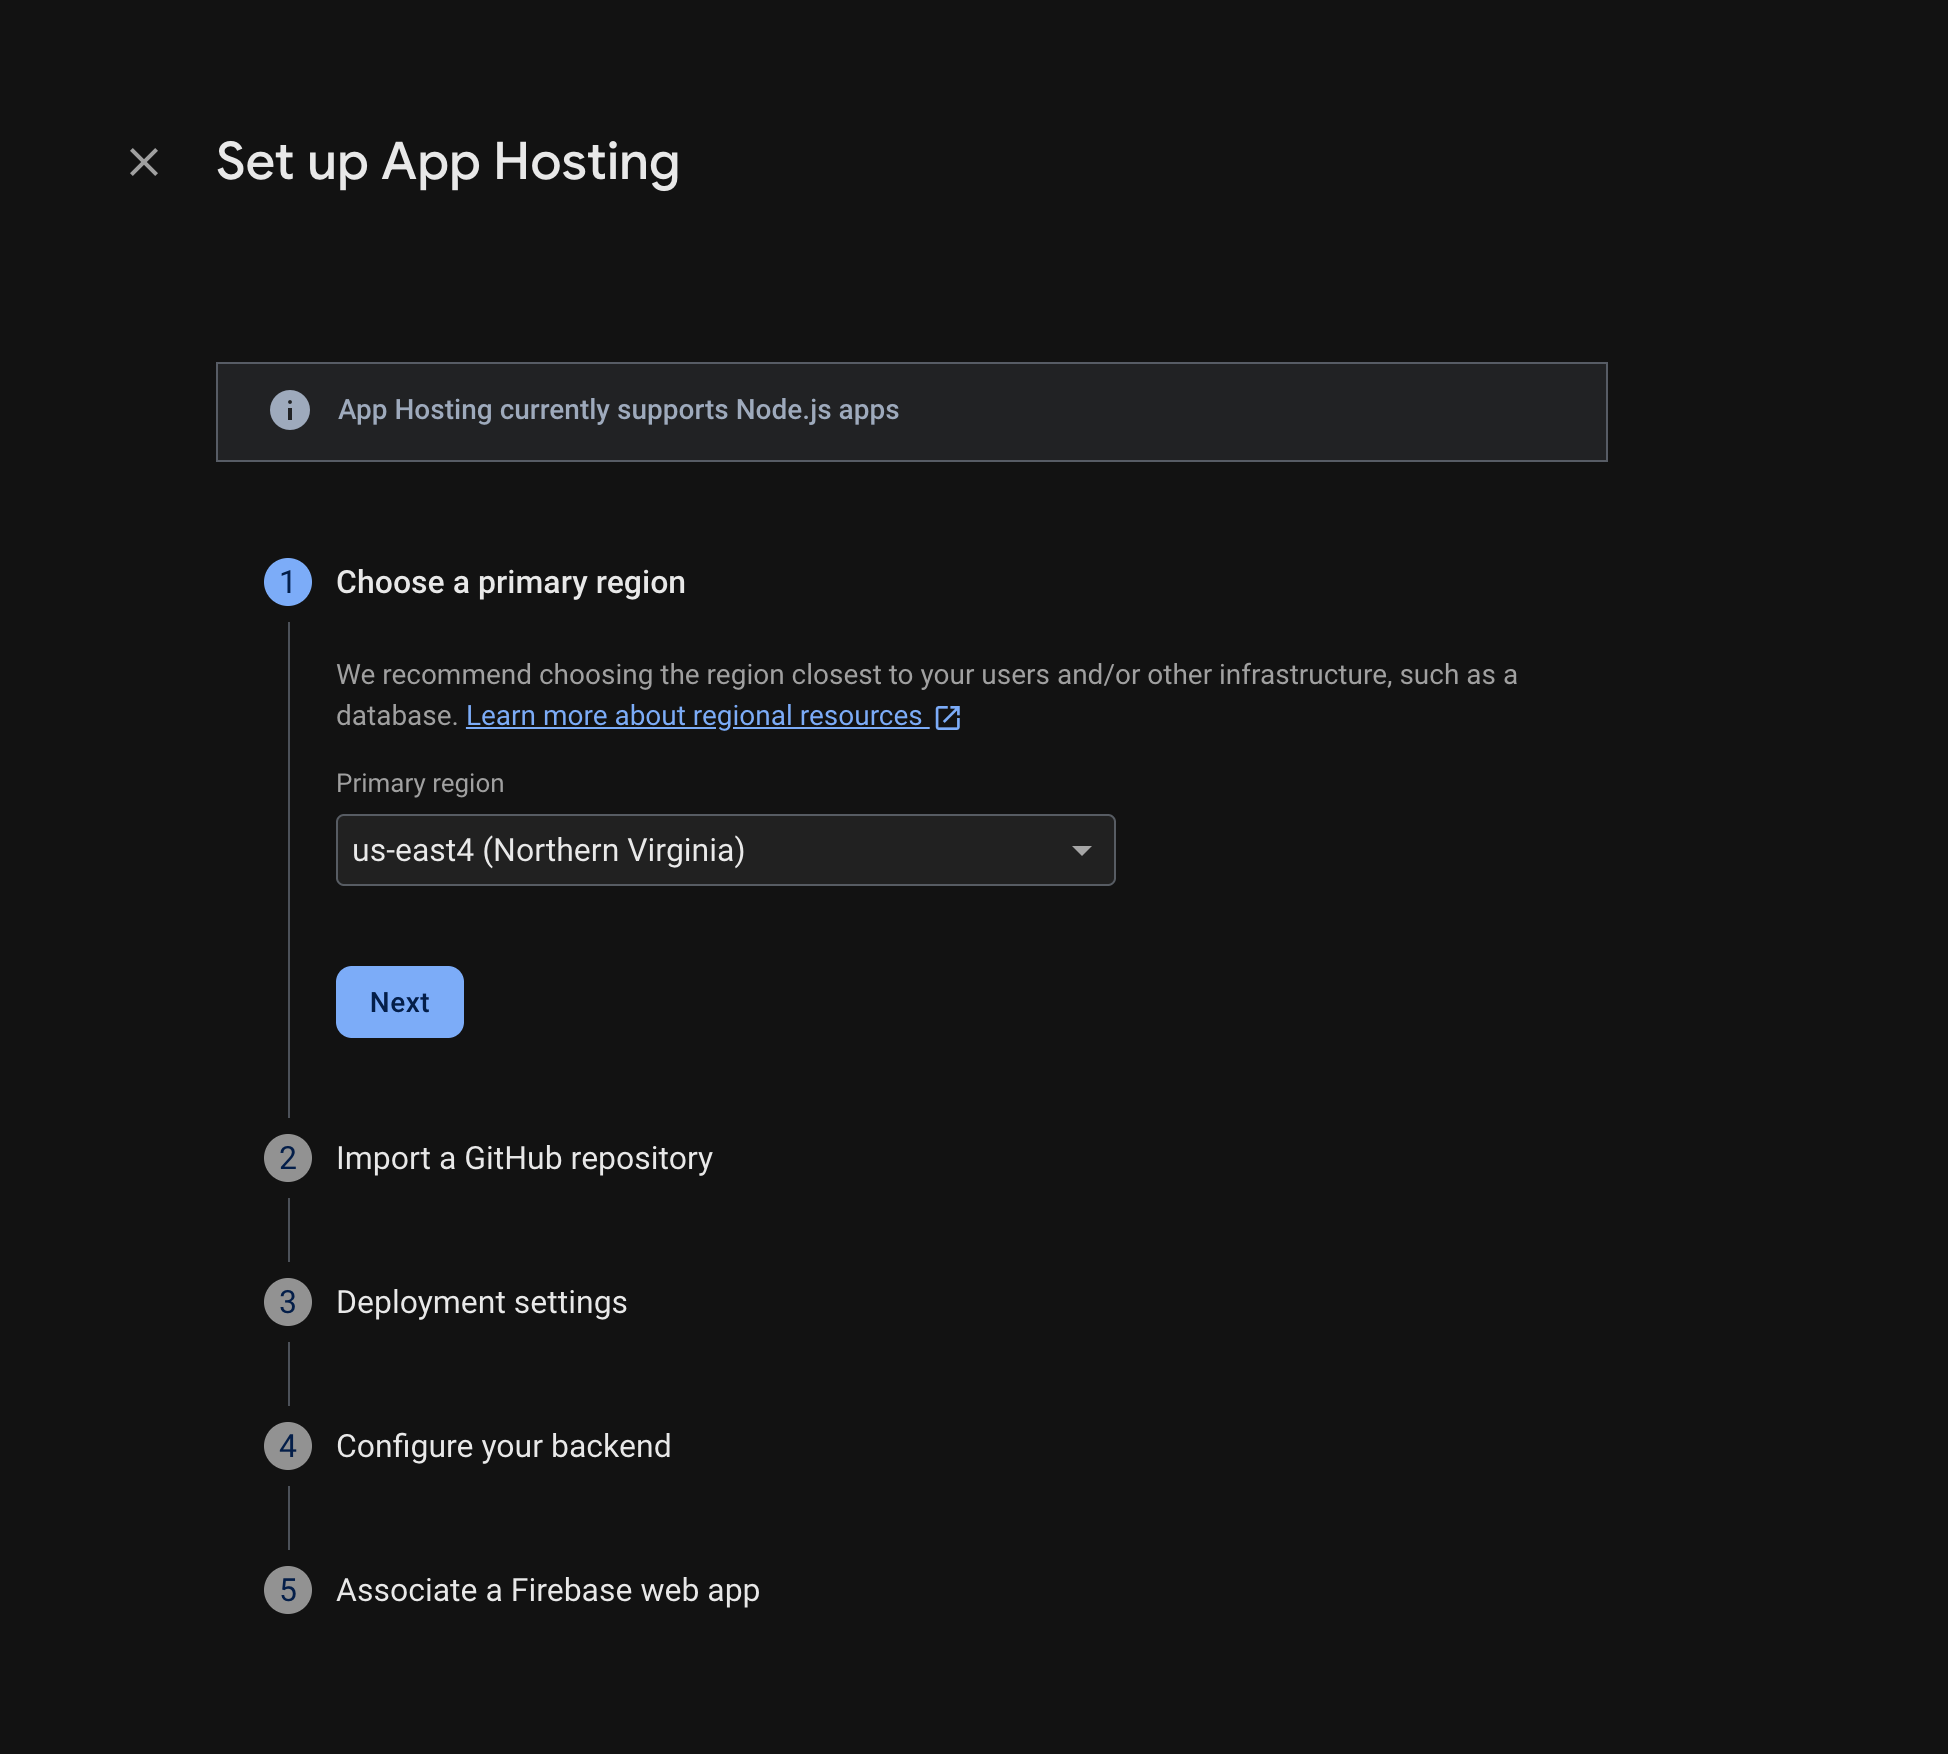
Follow the prompts to complete these steps:
- Choose a primary region (usually the region closest to your users).
- Connect to GitHub. Choose the repository you just created by forking the firebase-framework-tools repository.
- Set your app's root directory to one of the following:
- Set the live branch as main.
- Enable automatic rollouts (automatic rollouts are enabled by default).
- Assign a name to your backend.
- Select your runtime environment. By default, the newest recommended Node.js
version is pre-selected for you.
- Configure Automatic Base Image Updates (ABIU). ABIU is enabled by default and automatically applies security patches to your underlying environment. You can opt out of ABIU by selecting "Not specified" for your runtime.
- Create a new Firebase web app.
Select Finish and deploy.
Step 3: View the deployed app
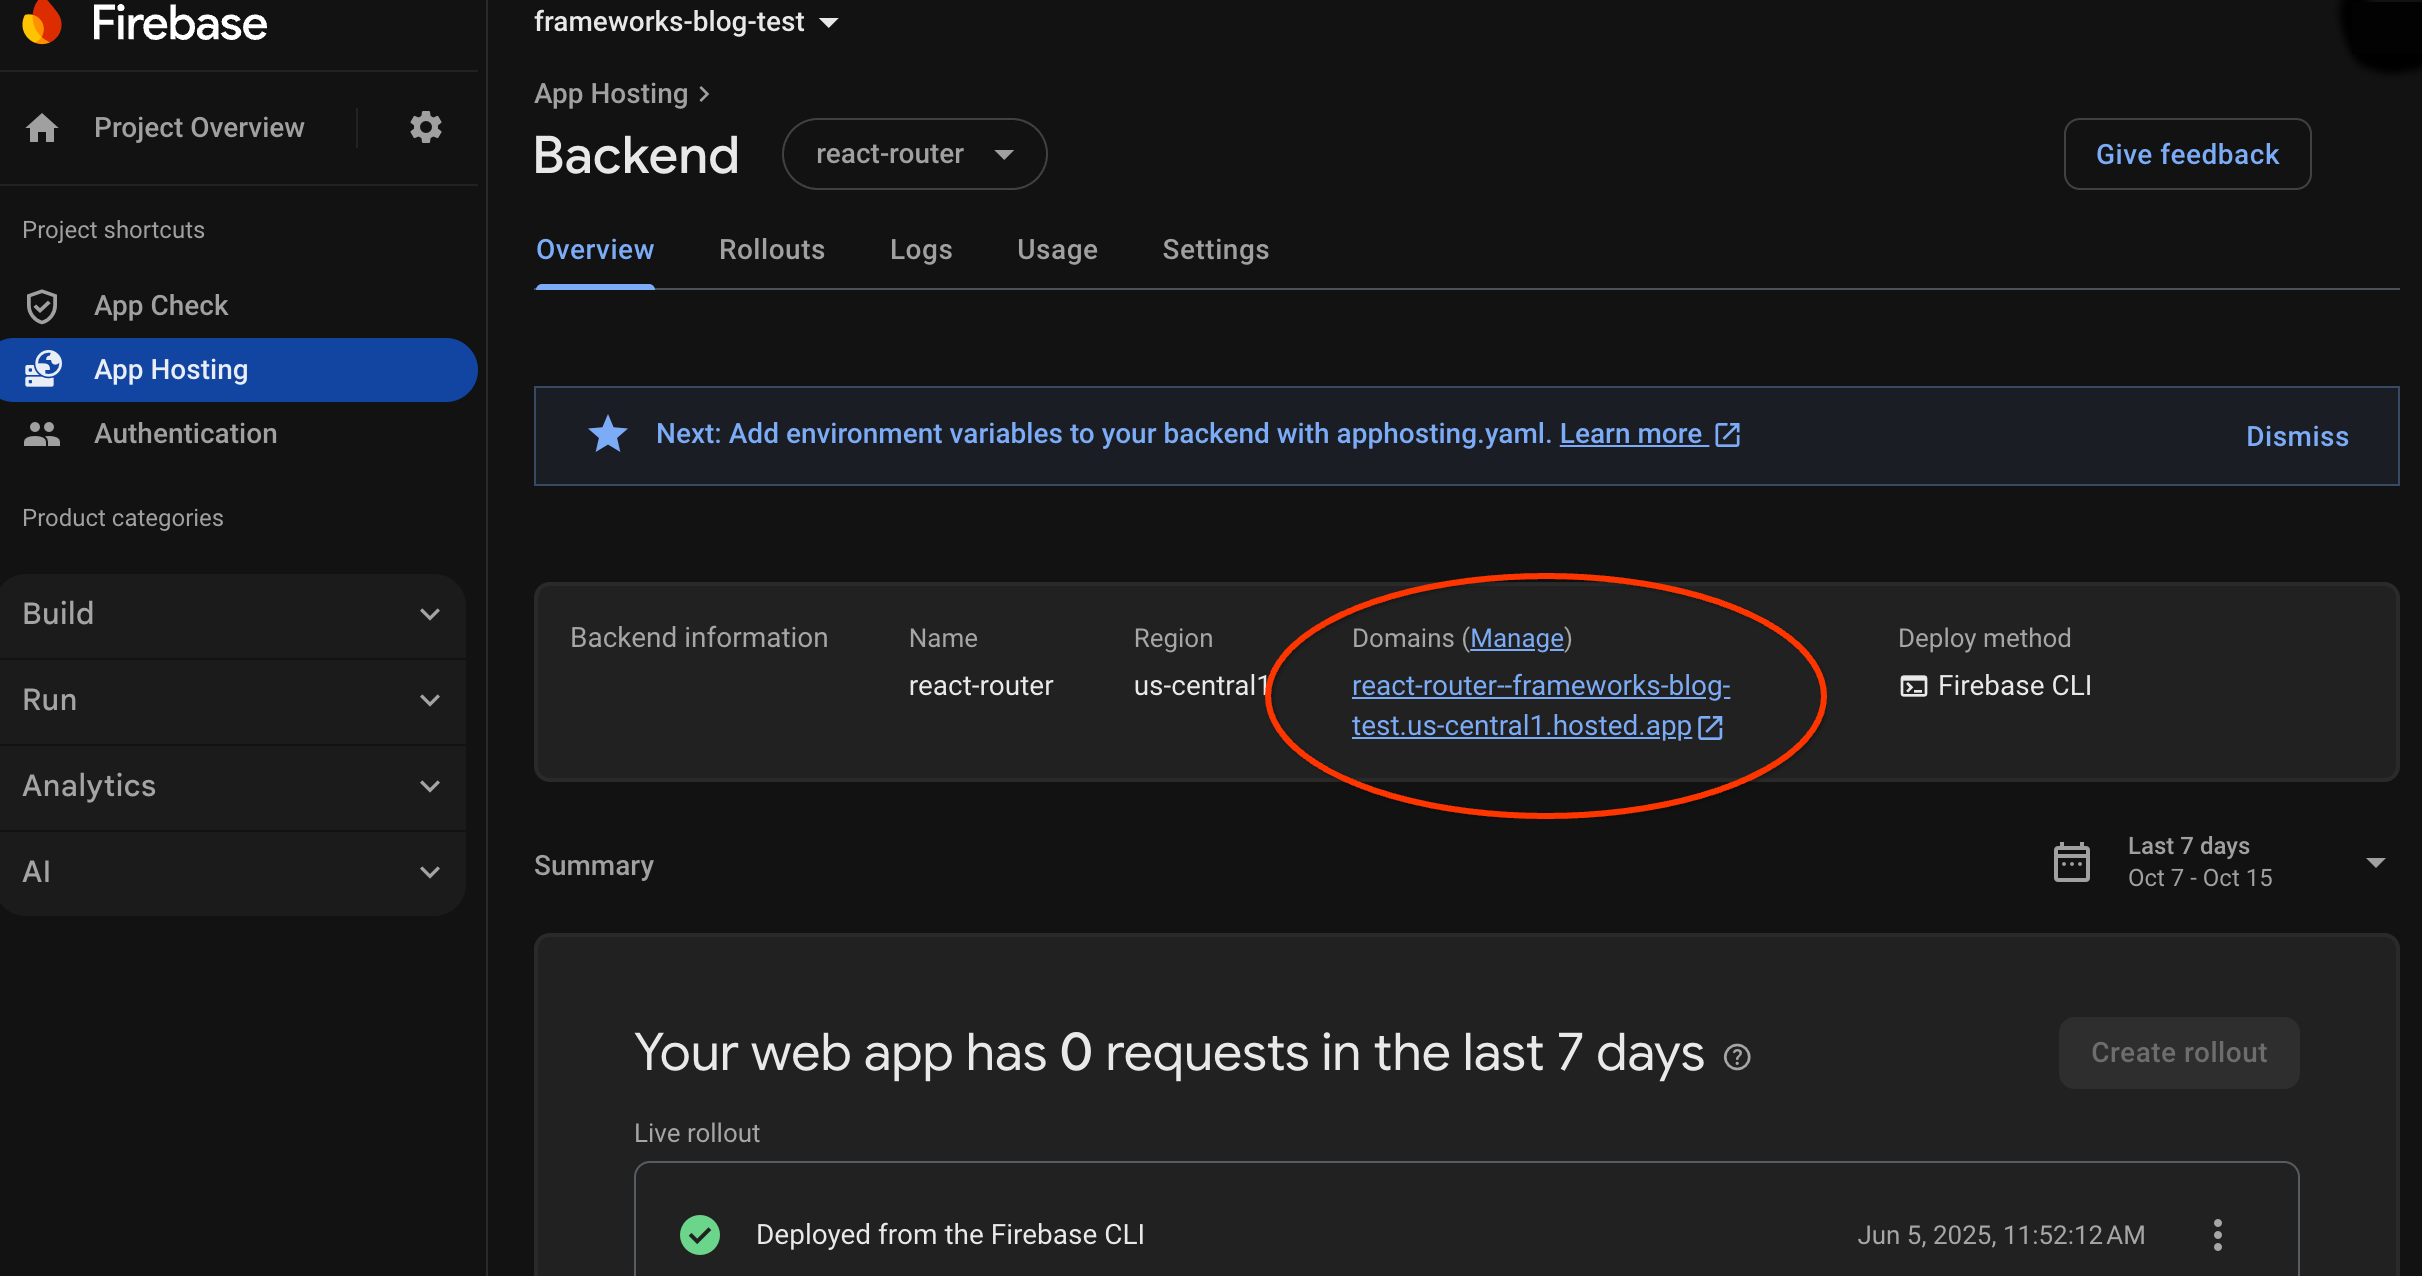
When you create a backend, Firebase gives you a no-cost subdomain where end
users can visit your web app. Its format is
backend-id--project-id.us-central1.hosted.app.
In the Backend information row in the dashboard for your backend, select the link to your live backend to view your new website:
Step 4: Trigger a rollout by pushing a change
Once your backend is created and you have a live URL, you can trigger the rollout of a new version of your web app whenever you push changes into the live branch of your GitHub repository. To perform a test of your App Hosting setup:
In your fork of the demo GitHub repository, navigate to the source of the demo app home page, make any recognizable edit you like, and then push your change to the main branch. To find your home page:
- Next.js:
/starters/nextjs/basic/src/app/page.tsx - Angular:
/starters/angular/basic/src/app/pages/home/home.component.html
- Next.js:
In the Firebase console, monitor App Hosting as your new change is rolled out to production. When the rollout is complete, you can view your change in the app's home page.
Next steps
- Go deeper: walk through a Firebase codelab that integrates a hosted app with Firebase Authentication and Google AI features: Next.js | Angular
- Connect a custom domain.
- Configure your backend—set environment variables, store secret parameters, and more.
- Monitor rollouts, site usage, and logs.