

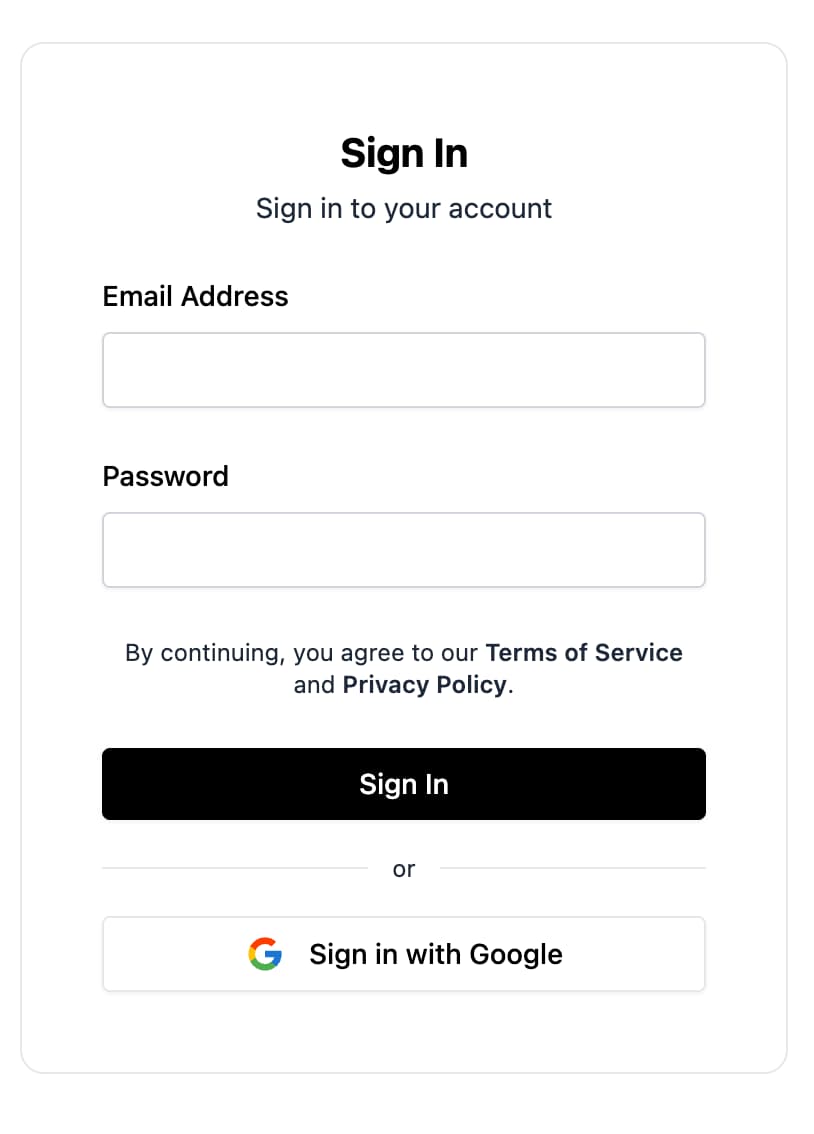
FirebaseUI for Web, Firebase Authentication JavaScript SDK पर बनी लाइब्रेरी का एक सेट है. इससे आपको पुष्टि करने के फ़्लो को जल्दी से शिप करने में मदद मिलती है.
वेब के लिए FirebaseUI से ये फ़ायदे मिलते हैं:
initializeApp(...)और मौजूदा Firebase JS SDK के साथ, मॉडर्न मॉड्यूलर SDK टूल का इस्तेमाल किया जा सकता है.- एक ही बड़े विजेट के बजाय, कंपोज़ेबल स्क्रीन, फ़ॉर्म, और बटन.
- React, Shadcn, और Angular के साथ काम करता है.
- रीडायरेक्ट बनाम पॉप-अप फ़्लो, Google One Tap, बिना नाम के अपग्रेड, फ़ोन की सेटिंग वगैरह के लिए कॉन्फ़िगर किए जा सकने वाले व्यवहार.
@firebase-oss/ui-translationsके ज़रिए स्थानीय भाषा के मुताबिक सहायता उपलब्ध है.- इसमें ईमेल/पासवर्ड, ईमेल लिंक, फ़ोन से पुष्टि करने की सुविधा, OAuth की सेवा देने वाली कंपनियां, और मल्टी-फ़ैक्टर फ़्लो के लिए पहले से मौजूद सहायता शामिल है.
इस गाइड में, React, Shadcn, और Angular ऐप्लिकेशन के लिए, इंस्टॉल करने, शुरू करने, साइन-इन करने के तरीकों, और सामान्य कॉन्फ़िगरेशन के बारे में बताया गया है.
शुरू करने से पहले
अपने वेब ऐप्लिकेशन में Firebase जोड़ें:
Firebase कंसोल में Authentication की सुविधा चालू करें.
अगर आपके प्रोजेक्ट में
firebaseपहले से मौजूद नहीं है, तो इसे इंस्टॉल करें:npm install firebaseमॉड्यूलर Firebase JS SDK का इस्तेमाल करें:
import { initializeApp } from 'firebase/app';

const app = initializeApp({
  /* your Firebase config */
});
अपना प्लैटफ़ॉर्म चुनें और FirebaseUI इंस्टॉल करें:
shadcn/ui पर आधारित React ऐप्लिकेशन के लिए,
components.jsonमें Firebase रजिस्ट्री जोड़ें:{ "registries": { "@firebase": "https://firebaseopensource.com/r/{name}.json" } }इस गाइड में इस्तेमाल किए गए सभी पुष्टि करने वाले कॉम्पोनेंट, उस रजिस्ट्री से उपलब्ध हैं. इनमें
sign-in-auth-screen,sign-up-auth-screen,email-link-auth-screen,oauth-screen,phone-auth-screen,google-sign-in-button,apple-sign-in-button, औरgithub-sign-in-buttonशामिल हैं.इसके बाद, वे कॉम्पोनेंट जोड़ें जिनका आपको इस्तेमाल करना है:
npx shadcn@latest add @firebase/sign-in-auth-screen @firebase/google-sign-in-buttonइससे, React FirebaseUI की बुनियादी डिपेंडेंसी इंस्टॉल हो जाती हैं.
shadcn/ui के बिना React ऐप्लिकेशन के लिए, इसे इंस्टॉल करें:
npm install @firebase-oss/ui-react@beta @firebase-oss/ui-stylesAngular ऐप्लिकेशन के लिए, इन्हें इंस्टॉल करें:
npm install @angular/fire @firebase-oss/ui-angular@beta @firebase-oss/ui-core@beta @firebase-oss/ui-styles@beta
FirebaseUI को चालू करना
initializeUI(...) की मदद से, शेयर किया गया यूज़र इंटरफ़ेस (यूआई) स्टोर बनाएं. इसके बाद, इसे अपने फ़्रेमवर्क इंटिग्रेशन में पास करें.
React
import { initializeApp } from 'firebase/app';
import { initializeUI } from '@firebase-oss/ui-core';
import { FirebaseUIProvider } from '@firebase-oss/ui-react';

const app = initializeApp({
  /* your Firebase config */
});

const ui = initializeUI({
  app,
});

export function AppProviders({ children }: { children: React.ReactNode }) {
  return <FirebaseUIProvider ui={ui}>{children}</FirebaseUIProvider>;
}
Shadcn
Shadcn, React की तरह ही सेटअप का इस्तेमाल करता है, क्योंकि यह भी @firebase-oss/ui-react का इस्तेमाल करता है:
import { initializeApp } from 'firebase/app';
import { initializeUI } from '@firebase-oss/ui-core';
import { FirebaseUIProvider } from '@firebase-oss/ui-react';

const app = initializeApp({
  /* your Firebase config */
});

const ui = initializeUI({
  app,
});

export function AppProviders({ children }: { children: React.ReactNode }) {
  return <FirebaseUIProvider ui={ui}>{children}</FirebaseUIProvider>;
}
ये कॉम्पोनेंट, आपकी मौजूदा shadcn स्टाइल का इस्तेमाल करते हैं. shadcn रजिस्ट्री का इस्तेमाल करते समय, आम तौर पर FirebaseUI की बंडल की गई सीएसएस इंपोर्ट नहीं की जाती है.
Angular
import { type ApplicationConfig } from '@angular/core';
import { provideFirebaseApp, initializeApp } from '@angular/fire/app';
import { provideFirebaseUI } from '@firebase-oss/ui-angular';
import { initializeUI } from '@firebase-oss/ui-core';

export const appConfig: ApplicationConfig = {
  providers: [
    provideFirebaseApp(() =>
      initializeApp({
        /* your Firebase config */
      }),
    ),
    provideFirebaseUI((apps) =>
      initializeUI({
        app: apps[0],
      }),
    ),
  ],
};
स्टाइल शामिल करें
FirebaseUI में, React और Angular के लिए पहले से बनाए गए यूज़र इंटरफ़ेस (यूआई) कॉम्पोनेंट होते हैं. कॉम्पोनेंट इस्तेमाल करने के लिए, आपको उनकी सीएसएस शामिल करनी होगी:
अगर React या Angular के साथ Tailwind का इस्तेमाल किया जा रहा है, तो:
अगर ऐसा नहीं है, तो FirebaseUI स्टाइल शामिल करें:
@import '@firebase-oss/ui-styles/dist.min.css';
FirebaseUI for Web, सीएसएस वैरिएबल को बदलने की सुविधा के ज़रिए कस्टम थीमिंग के साथ काम करता है. ज़्यादा जानकारी के लिए, थीम से जुड़े दस्तावेज़ देखें.
साइन-इन करने के तरीके सेट अप करना
उपयोगकर्ताओं के साइन इन करने से पहले, Firebase कंसोल में Authentication -> Sign-in method में जाकर, हर उस प्रोवाइडर को चालू करें जिसका इस्तेमाल करना है.
FirebaseUI for Web, स्क्रीन, फ़ॉर्म, और बटन का इस्तेमाल करता है. इन्हें सीधे तौर पर रेंडर किया जाता है.
उन फ़्लो के लिए शेयर किया गया कॉन्फ़िगरेशन, behaviors में मौजूद होता है. इसे initializeUI(...) को पास किया जाता है.
ईमेल पता और पासवर्ड
- Firebase कंसोल में, ईमेल/पासवर्ड चालू करें.
- React में
SignInAuthScreenयाSignUpAuthScreen, Shadcn में जनरेट किए गएsign-in-auth-screenयाsign-up-auth-screenकॉम्पोनेंट या Angular मेंfui-sign-in-auth-screenयाfui-sign-up-auth-screenरेंडर करें.
ईमेल लिंक से पुष्टि करने की सुविधा
- Firebase कंसोल में, ईमेल/पासवर्ड और ईमेल लिंक (बिना पासवर्ड के साइन-इन करने की सुविधा) चालू करें.
- React में
EmailLinkAuthScreen, Shadcn में जनरेट किया गयाemail-link-auth-screenकॉम्पोनेंट या Angular मेंfui-email-link-auth-screenरेंडर करें. - ज़रूरत पड़ने पर, मुख्य हेल्पर का इस्तेमाल करके मौजूदा यूआरएल से साइन-इन करें.
import { completeEmailLinkSignIn } from '@firebase-oss/ui-core';

await completeEmailLinkSignIn(ui, window.location.href);
OAuth की सुविधा देने वाली कंपनियां
FirebaseUI for Web, Google, Apple, Facebook, GitHub, Microsoft, और X/Twitter जैसे प्रोवाइडर के लिए, पहले से मौजूद बटन के साथ काम करता है.
- Firebase कंसोल में, सेवा देने वाली कंपनी को चालू करें.
- ज़रूरत पड़ने पर, अपने ऐप्लिकेशन के डोमेन को अनुमति वाले डोमेन में जोड़ें.
- अपनी पसंद के बटन के साथ
OAuthScreenरेंडर करें. जैसे, React मेंGoogleSignInButton,AppleSignInButton,FacebookSignInButton,GitHubSignInButton,MicrosoftSignInButtonयाTwitterSignInButton, अपने ऐप्लिकेशन में जनरेट किए गए shadcn के बराबर, या Angular मेंfui-oauth-screenके साथfui-google-sign-in-button,fui-apple-sign-in-button,fui-facebook-sign-in-button,fui-github-sign-in-button,fui-microsoft-sign-in-buttonयाfui-twitter-sign-in-button.
फ़ोन नंबर
- Firebase कंसोल में, फ़ोन को चालू करें.
- अपने ऐप्लिकेशन डोमेन को अनुमति वाले डोमेन में जोड़ें.
- React में
PhoneAuthScreenयाPhoneAuthForm, Shadcn में जनरेट किए गएphone-auth-screenयाphone-auth-formकॉम्पोनेंट या Angular मेंfui-phone-auth-screenरेंडर करें.
ज़रूरी नहीं: उन देशों को कॉन्फ़िगर करें जहां इस सुविधा का इस्तेमाल किया जा सकता है, डिफ़ॉल्ट देश को कॉन्फ़िगर करें या reCAPTCHA के व्यवहार को कॉन्फ़िगर करें:
import {
  countryCodes,
  initializeUI,
  recaptchaVerification,
} from '@firebase-oss/ui-core';

const ui = initializeUI({
  app,
  behaviors: [
    countryCodes({
      allowedCountries: ['GB', 'US', 'FR'],
      defaultCountry: 'GB',
    }),
    recaptchaVerification({
      size: 'compact',
      theme: 'light',
    }),
  ],
});
कस्टमाइज़ेशन
behaviors में शेयर किए गए ऑथराइज़ेशन के व्यवहार को कॉन्फ़िगर करें. इसे initializeUI(...) को पास किया जाता है.
साइन अप करने के दौरान, डिसप्ले नेम डालना ज़रूरी है
import { initializeUI, requireDisplayName } from '@firebase-oss/ui-core';

const ui = initializeUI({
  app,
  behaviors: [requireDisplayName()],
});
पहचान छिपाने वाले उपयोगकर्ताओं को अपग्रेड करना
autoUpgradeAnonymousUsers(...) व्यवहार का इस्तेमाल करके, किसी गुमनाम सेशन को साइन इन किए गए खाते में मर्ज करें.
import {
  autoUpgradeAnonymousUsers,
  initializeUI,
} from '@firebase-oss/ui-core';

const ui = initializeUI({
  app,
  behaviors: [
    autoUpgradeAnonymousUsers({
      async onUpgrade(ui, oldUserId, credential) {
        // Migrate or merge user data here if needed.
      },
    }),
  ],
});
माइग्रेशन के बारे में ज़्यादा जानने के लिए, MIGRATION.md देखें.
साइन इन करें
आपको जिस पुष्टि करने वाली स्क्रीन को रेंडर करना है उसे रेंडर करें. साथ ही, कॉम्पोनेंट कॉलबैक या Angular आउटपुट में सफलता को मैनेज करें.
React
```tsx import { SignInAuthScreen } from '@firebase-oss/ui-react'; import { useNavigate } from 'react-router';export function SignInPage() { const navigate = useNavigate();
return (
Shadcn
Shadcn, React की तरह ही रनटाइम और फ़्लो का इस्तेमाल करता है. इनमें सिर्फ़ यह अंतर है कि जनरेट किए गए कॉम्पोनेंट को @firebase-oss/ui-react से इंपोर्ट करने के बजाय, अपने ऐप्लिकेशन से इंपोर्ट किया जाता है:
export function SignInPage() { const navigate = useNavigate();
return (
Angular
import { Component } from '@angular/core';
import { Router } from '@angular/router';
import { SignInAuthScreenComponent } from '@firebase-oss/ui-angular';
import type { User } from '@angular/fire/auth';

@Component({
  selector: 'app-sign-in-page',
  standalone: true,
  imports: [SignInAuthScreenComponent],
  template: `
    <fui-sign-in-auth-screen (signIn)="onSignIn($event)" />
  `,
})
export class SignInPageComponent {
  constructor(private router: Router) {}

  onSignIn(user: User) {
    this.router.navigate(['/dashboard']);
  }
}
साइन आउट करें
उपयोगकर्ताओं को साइन आउट करने के लिए, Firebase से पुष्टि करना के स्टैंडर्ड साइन-आउट एपीआई का इस्तेमाल करें:
import { getAuth, signOut } from 'firebase/auth';

const auth = getAuth(app);
await signOut(auth);
OAuth की सुविधा देने वाली कंपनियां: पॉप-अप बनाम रीडायरेक्ट
व्यवहारों के साथ, सेवा देने वाली कंपनी के साइन-इन फ़्लो को चुनें:
- पॉप-अप फ़्लो के लिए
providerPopupStrategy() - रीडायरेक्ट फ़्लो के लिए
providerRedirectStrategy()
पॉप-अप डिफ़ॉल्ट रूप से चालू होता है. इसलिए, आपको सिर्फ़ रीडायरेक्ट को साफ़ तौर पर कॉन्फ़िगर करना होगा:
import { initializeUI, providerRedirectStrategy } from '@firebase-oss/ui-core';

const ui = initializeUI({
  app,
  behaviors: [providerRedirectStrategy()],
});
OAuth बटन रेंडर करने के लिए, उन्हें अपने प्लैटफ़ॉर्म के हिसाब से स्क्रीन पर जोड़ें.
React
import {
  GitHubSignInButton,
  GoogleSignInButton,
  OAuthScreen,
} from '@firebase-oss/ui-react';

export function OAuthPage() {
  return (
    <OAuthScreen>
      <GoogleSignInButton />
      <GitHubSignInButton />
    </OAuthScreen>
  );
}
Shadcn
import { GitHubSignInButton } from '@/components/github-sign-in-button';
import { GoogleSignInButton } from '@/components/google-sign-in-button';
import { OAuthScreen } from '@/components/oauth-screen';

export function OAuthPage() {
  return (
    <OAuthScreen>
      <GoogleSignInButton />
      <GitHubSignInButton />
    </OAuthScreen>
  );
}
Angular
import { Component } from '@angular/core';
import {
  GithubSignInButtonComponent,
  GoogleSignInButtonComponent,
  OAuthScreenComponent,
} from '@firebase-oss/ui-angular';

@Component({
  selector: 'app-oauth-page',
  standalone: true,
  imports: [
    OAuthScreenComponent,
    GoogleSignInButtonComponent,
    GithubSignInButtonComponent,
  ],
  template: `
    <fui-oauth-screen>
      <fui-google-sign-in-button />
      <fui-github-sign-in-button />
    </fui-oauth-screen>
  `,
})
export class OAuthPageComponent {}
Google One Tap
Google One Tap को चालू करने के लिए, oneTapSignIn(...) के तरीके का इस्तेमाल करें:
import { initializeUI, oneTapSignIn } from '@firebase-oss/ui-core';

const ui = initializeUI({
  app,
  behaviors: [
    oneTapSignIn({
      clientId: 'YOUR_GOOGLE_WEB_CLIENT_ID',
      autoSelect: false,
      cancelOnTapOutside: false,
    }),
  ],
});
पक्का करें कि Firebase कंसोल में, Google से साइन-इन करने की सुविधा चालू हो. इसके बाद, Google के सेवा देने वाली कंपनी की सेटिंग से वेब क्लाइंट आईडी कॉपी करें.
सेवा की शर्तें और निजता नीति
प्लैटफ़ॉर्म की सेवा देने वाली कंपनी के कॉन्फ़िगरेशन के ज़रिए, नीति के लिंक अटैच करें.
React
```tsx import { FirebaseUIProvider } from '@firebase-oss/ui-react';<FirebaseUIProvider ui={ui} policies={{ termsOfServiceUrl: 'https://example.com/terms', privacyPolicyUrl: 'https://example.com/privacy', }}
{children} ; ```
Shadcn
React की तरह ही FirebaseUIProvider कॉन्फ़िगरेशन का इस्तेमाल करें.
Angular
import { type ApplicationConfig } from '@angular/core';
import { provideFirebaseUIPolicies } from '@firebase-oss/ui-angular';

export const appConfig: ApplicationConfig = {
  providers: [
    provideFirebaseUIPolicies(() => ({
      termsOfServiceUrl: 'https://example.com/terms',
      privacyPolicyUrl: 'https://example.com/privacy',
    })),
  ],
};
अनुवाद
FirebaseUI for Web, @firebase-oss/ui-translations के ज़रिए स्थानीय भाषा में उपलब्ध है.
import { initializeUI } from '@firebase-oss/ui-core';
import { registerLocale } from '@firebase-oss/ui-translations';

const enUsCustom = registerLocale('en-US', {
  labels: {
    signIn: 'Continue',
  },
});

const ui = initializeUI({
  app,
  locale: enUsCustom,
});
अगले चरण
- पूरे एपीआई, इसके काम करने के तरीके, और कॉम्पोनेंट के रेफ़रंस के बारे में जानने के लिए, README.md पढ़ें.
- अगर आपको किसी मौजूदा ऐप्लिकेशन को FirebaseUI for Web पर माइग्रेट करना है, तो MIGRATION.md पढ़ें.
- पैकेज के हिसाब से दस्तावेज़ देखने के लिए, packages/react/README.md, packages/shadcn/README.md, और packages/angular/README.md पर जाएं.
- examples/react, examples/shadcn, और examples/angular में दिए गए उदाहरण देखें.